While a lot of the “sign up” focus around events is centered on attendees, many events actually have additional categories of people (or organizations) they need to sign up. One use-case we see frequently is vendor registrations for festivals and large events like air shows. This blog looks at best practices for setting up and managing the unique needs of vendor registration.
Unique Challenges for Vendor Registrations
The priorities for vendor registrations are different than the goals for attendee sign-ups.
- Additional Information Collection: Vendor registrations typically require more details than a standard ticket. Common fields include contact name(s), phone numbers, booth space, business name, and a business license. Additionally, many events carefully vet their vendors. This may require links to a website, examples of their work, a vendor category, and setup details.
- Limited Availability: Events have limited space and want to ensure only the highest quality vendors participate in their event. Because of this, events use a process to either strategically cap vendor registrations. Alternatively, they use a two-step process in which the application is free and the vendor is charged after their application is approved.
Setting Up Vendor Registration
There are a few ways for an event to setup vendor registration, depending on the specific needs of the event.
1. A publicly visible ticket option within the same ticket event.
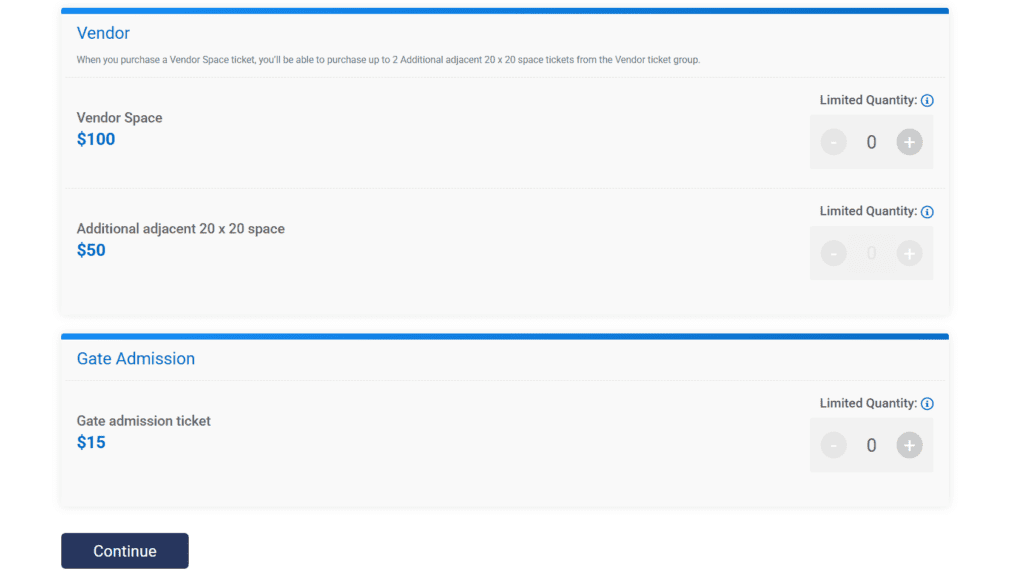
Some events opt to simply have a “ticket” option that’s for vendors. In this scenario, a ticket group is created for vendors with all vendor ticket options added. In this scenario, the vendor options display in the normal ticket purchase path.
Pros: This makes vendor registration very obvious and easy to select.
Cons: This can also can create confusion for ticket buyers, and make it harder to customize setting specifically for vendors. This is typically only recommended when minimal vetting is required.
2. A private ticket option with separate links.
Some events will host vendor registration on the same event as their attendee tickets, but will set the vendor tickets to be private. This means that the vendor options do not show in the normal ticket purchase path. Typically, an event will then add a menu item on their event website with information for vendors, and will include the link to the private tickets via a button on that page.
Pros: This keeps all the event information in one place. At the same time, it keeps the vendor options segregated and showing them only when it’s known that the person is seeking to apply as a vendor.
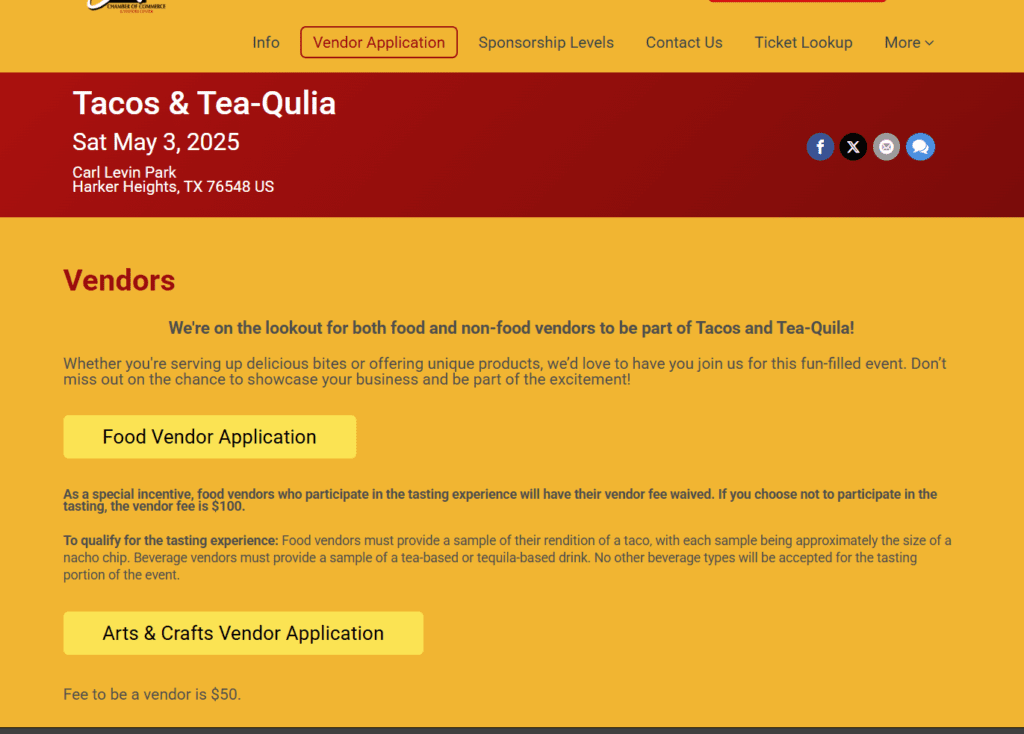
Cons: You can only show one ticket option at a time from the private link. This is fine if, like the event below, you have separate vendor categories and want to link to them individually via buttons. However, if you have a range of vendor options (like different sized spaces) and you want them to all show at once for the vendor to pick from, this may not be your best choice.
Setting up Private Ticket Codes from Tickets >> Setup
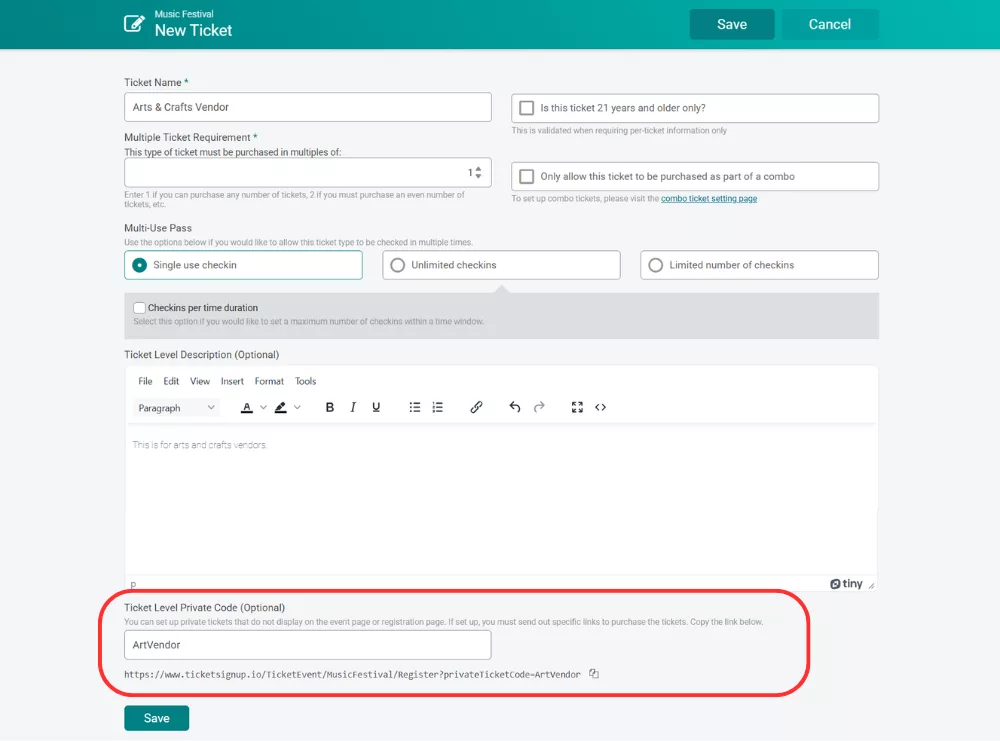
Linking to Vendor Registration from Website via Private Event Code
3. A standalone ticket event
Some events go a step further in separating their general event tickets from their vendor registrations and setup a separate ticket event for vendors. This “event” is typically lightly designed and focused on vendor information, with just simple branding updates to demonstrate validity.
Pros: This may be particularly beneficial if your event collects the vendor fee after the initial registration. If you have many vendor options, it’s the best way to show all vendor options at once without overwhelming general ticket purchasing. It also allows an event to add more detailed information for vendors without creating confusion for event attendees who just want to know where the entry gate is.
Cons: This can create confusion about where vendors should go to register. To limit any issues, add a menu item on your ticket event page and use an external URL to link to the page for vendors.
Add Vendor Options to Your Event Website
Whatever setup you opt for, it’s important that vendor options are easy to find. If you have separate events/websites for your attendee tickets and vendor applications, simply use Website Builder (Website >> Website Builder on your dashboard) to add an external link to your attendee website to link to your vendor registration site.
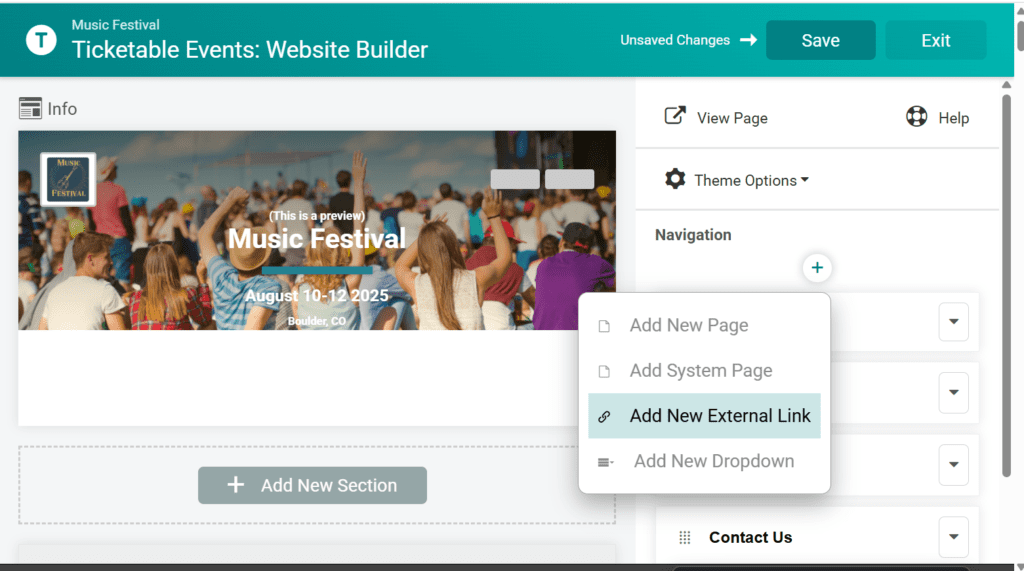
Additionally, you can use Website Builder to add additional content pages to your website using the “Add New Page” option above. This will allow you to create additional pages with more details for vendors, such as requirements for vending or load-in processes.
Customizing Your Vendor Registration
Update Information Collection
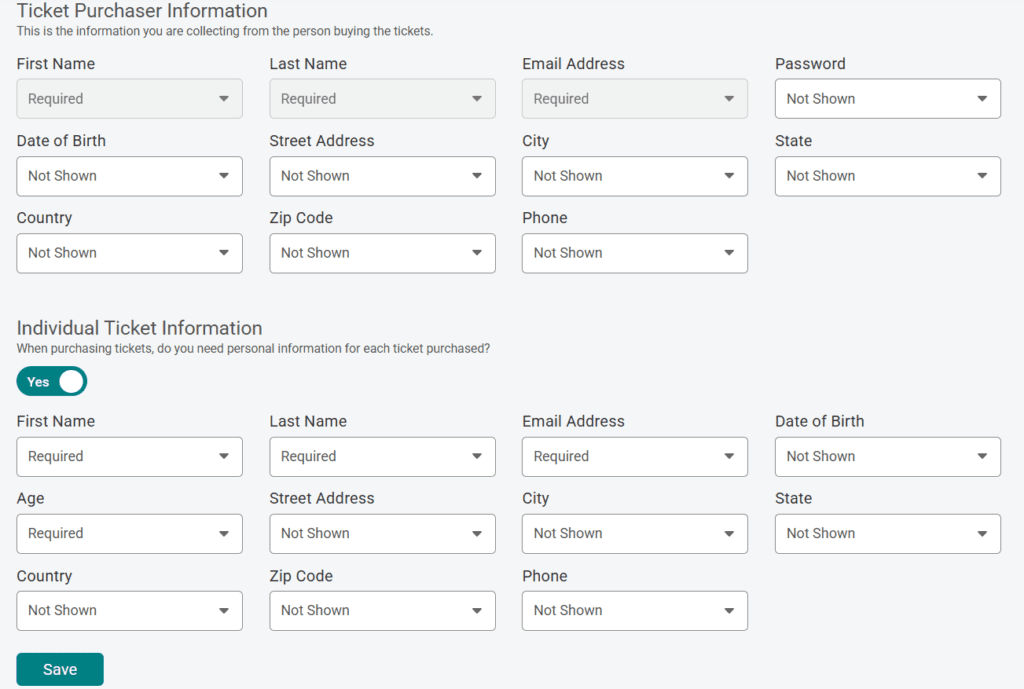
By default, TicketSignup requires the first name, last name, and email for the ticket purchaser. However, you can also require more information for the purchaser. Additionally, you can require details about each ticket holder, not just the purchaser. You’d want to do this if you need names (or more) for each person working the booth, not just one contact for a booth.
You can update your information collection settings from your dashboard via Tickets >> Information Collection.
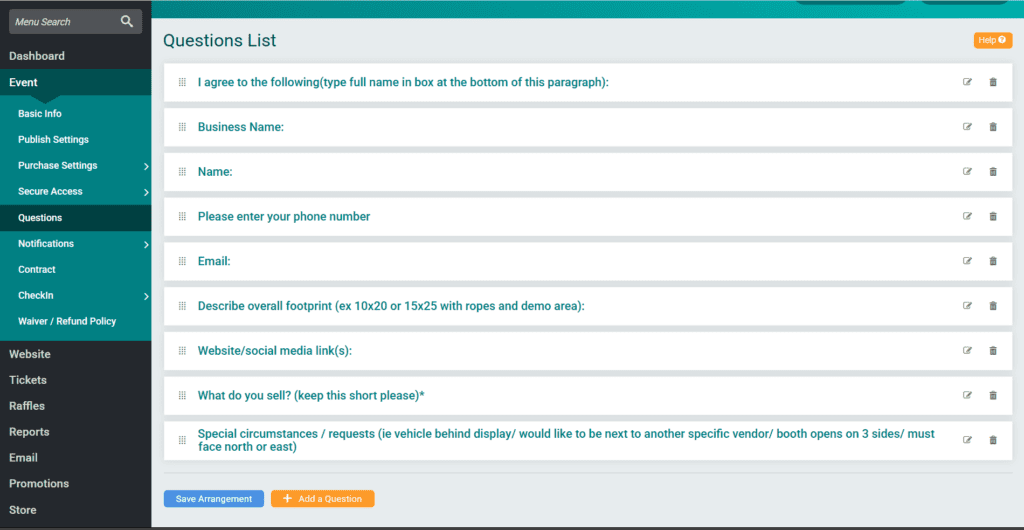
Add Additional Questions
Next, you can add more questions to the registration flow for vendors. These can serve one or more of the following purposes:
- Provide details needed to create a vendor layout. This might be things like the size of the booth or if electricity is needed.
- Provide information for vendor listings. This might include items like company website or social media links to add to the vendor information on the event website.
- Provide specifics for vendor selection. For events that carefully vet vendors and limit those who are accepted, questions can include a request for links to their professional website or the menu for their food truck.
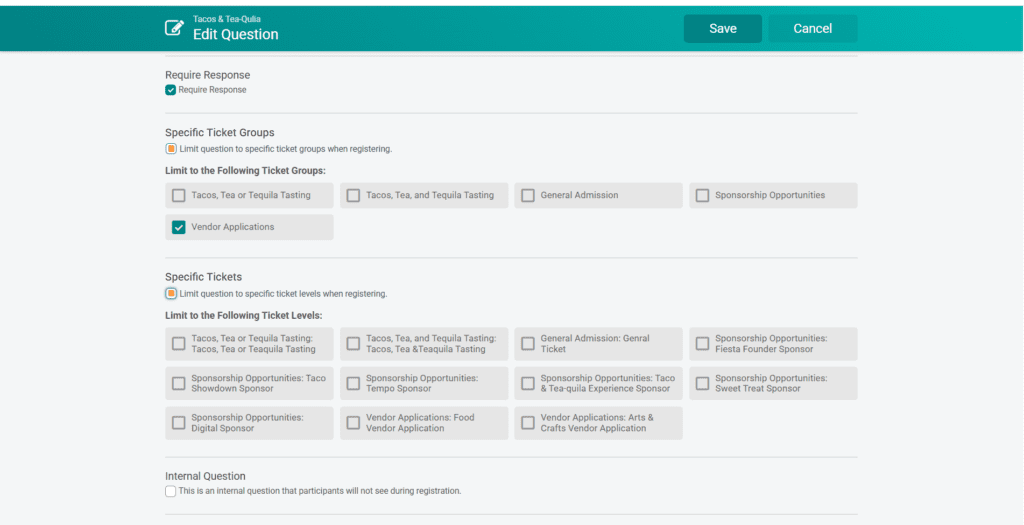
Questions can be asked of everyone, or limited to specific tickets. So, if you have questions that only apply to art vendors and not food vendors, you can set who is asked each question.
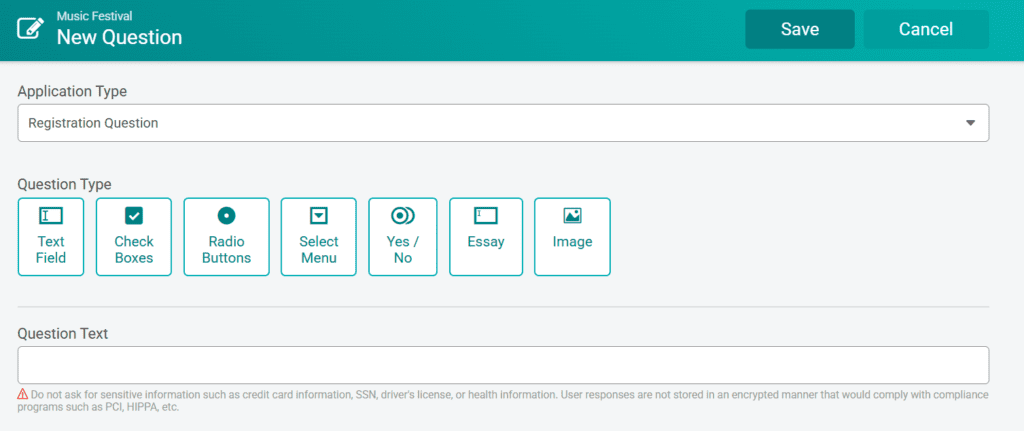
Flexible question options allow you to pick the best format for your questions.
- Text field for a short open-ended response
- Check Boxes for a multiple choice response where more than one option can be selected.
- Radio Buttons and Select Menu for a multiple choice response where only one option can be selected.
- Yes/No for simple yes/no questions
- Essay for a long open-ended response
- Image for rare instances where an image needs to be uploaded (like a required screenshot of their business website)
Collecting Payment for Vendor Registrations
Up-Front Payment
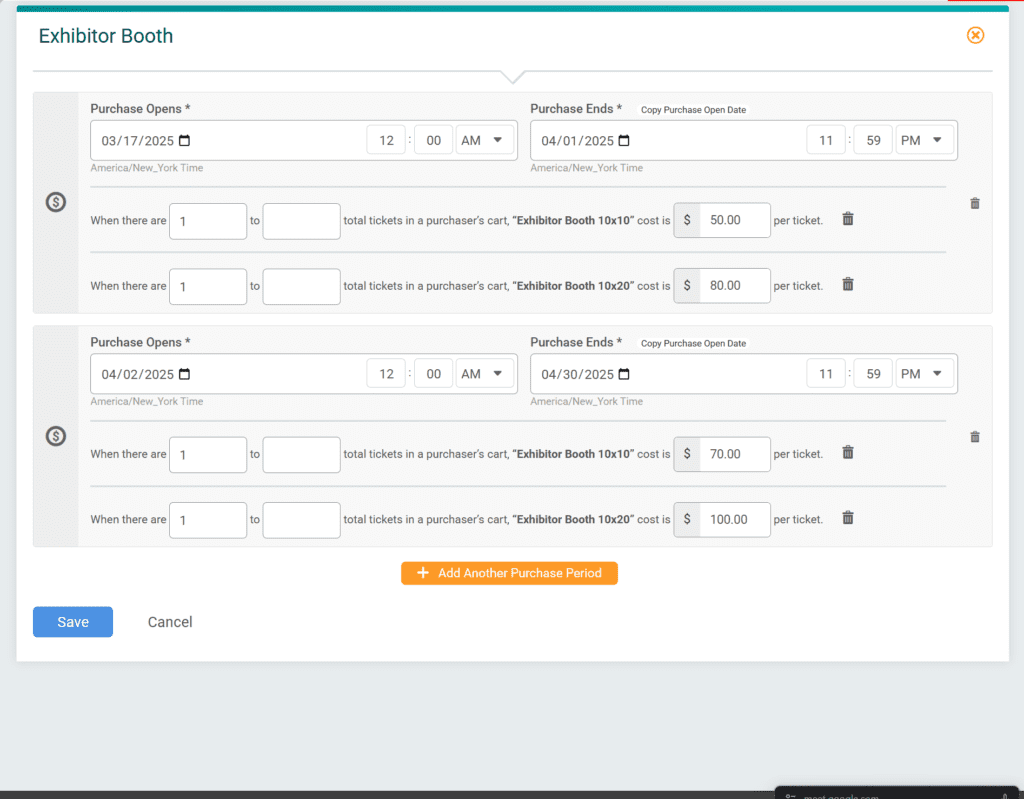
For events with limited vetting of vendors, simply make your ticket price your vendor registration cost. If you have multiple price points (such as a 10×10 space and a 20×10 space), add a ticket option for each one.
Use price increases if your your price changes by date to encourage exhibitors to sign up promptly.
Payment After Acceptance
For events that heavily vet all exhibitors and may not accept every application, you can set up your Vendor Application in TicketSignup. Since you’re not collecting any fee at that time, your exhibitors won’t be charged.
Once you’ve accepted a vendor, simply send them an invoice for their total cost. Invoicing can be found on your event dashboard from Financial >> Invoicing.
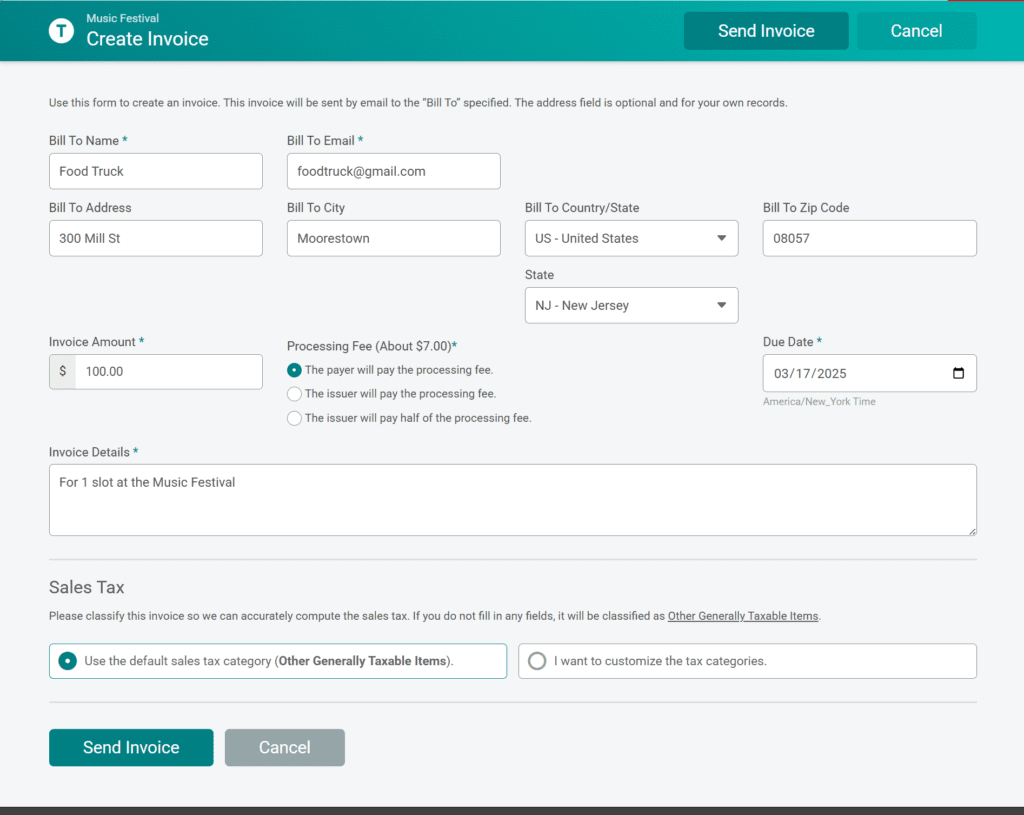
Once your invoices are sent, it’s easy to track their status via the invoice reporting so you can quickly and easily follow up with any vendors who are late on payment.