
Some events have needs for printed tickets. For example, we have a customer that wants to print tickets for their sponsors, so their sales team can hand them free tickets by hand. There are other use cases where people will buy tickets online, but you might want to hand them a ticket or a wrist band with a QR code on it to check in to specific attractions or receive physical things like a beer or equipment to do the event.
In this blog, we will cover the first scenario where there is a need to give away a “free” ticket. There are three main steps:
- Create a spreadsheet and import a set of tickets. The spreadsheet would contain information that you would want printed on the ticket – like ticket type (Adult/Child/Sponsor/VIP, etc.), price so you can show the value of the ticket, and other information.
- Export that set of tickets with the Confirmation Code that TicketSignup creates. That confirmation code will be turned into a QR Code that will make each ticket custom.
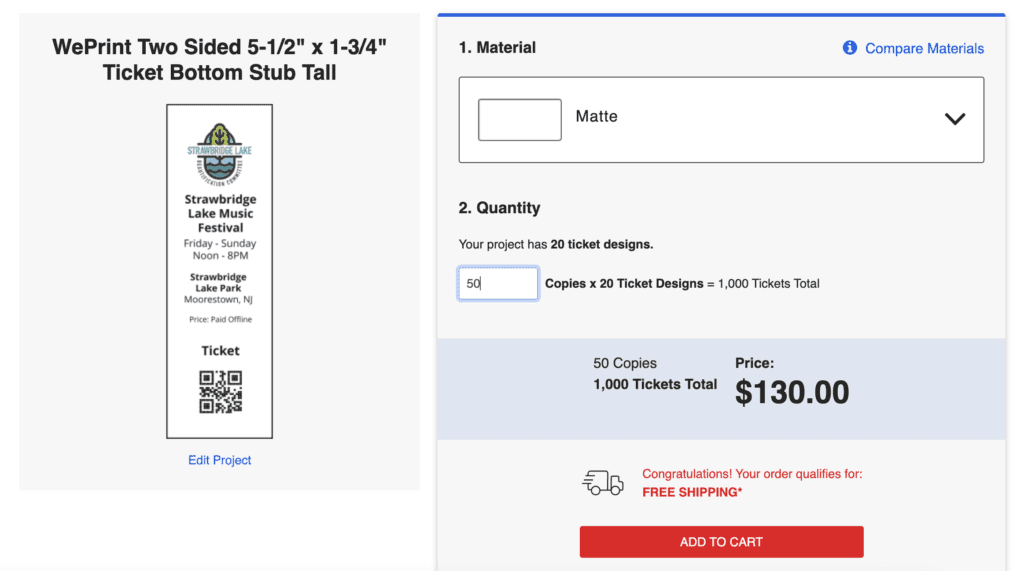
- Import that data into a ticket printing application. We used Avery in this example because their cost is very reasonable and they have hundreds of ticket sizes and designs. They also offer the print service ($25 for the minimum order of 60 tickets and $130 for 1,000 tickets), as well as a PDF export so you can print your own (and probably buy their card stock to print on).
Sample Event
For this Sponsor Pass example, we set up a sample event, and created a hidden ticket type – “Sponsor 3 Day Pass” that we will use to import all the sponsor tickets we want to create:

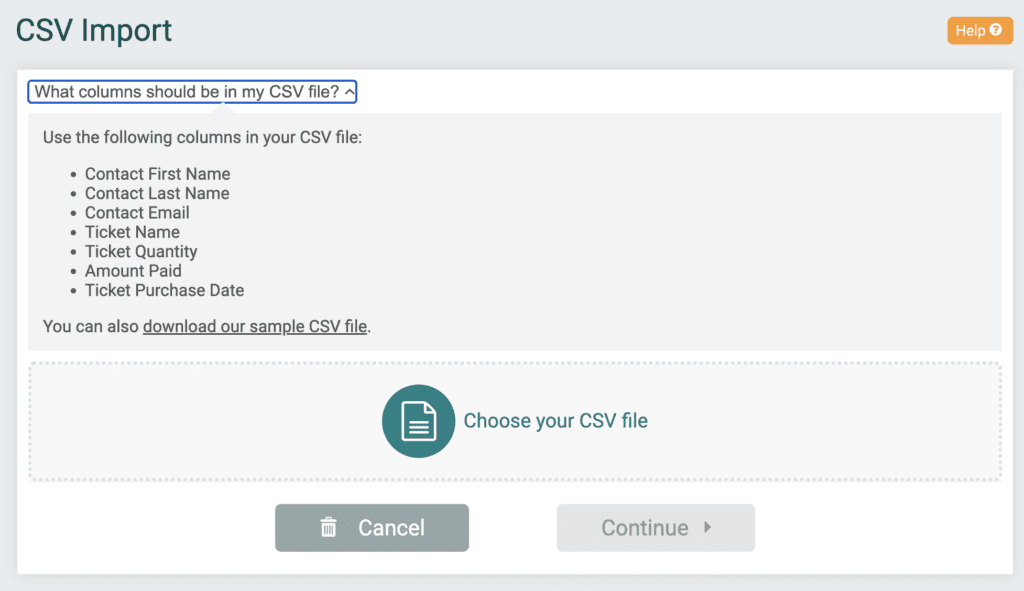
TicketSignup makes it easy to import a spreadsheet and even has a sample spreadsheet you can download:
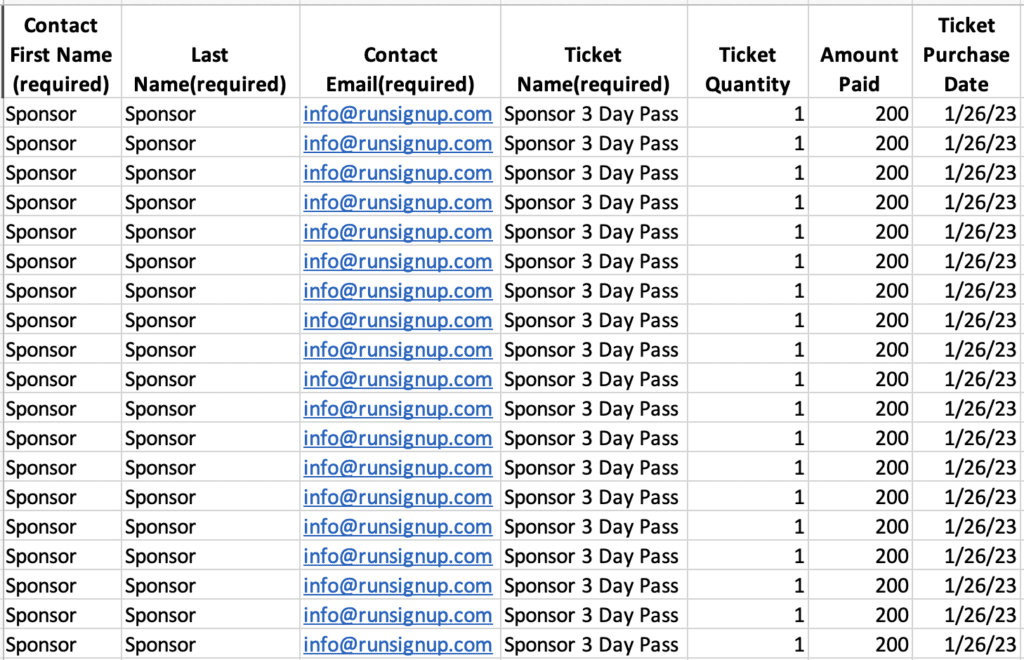
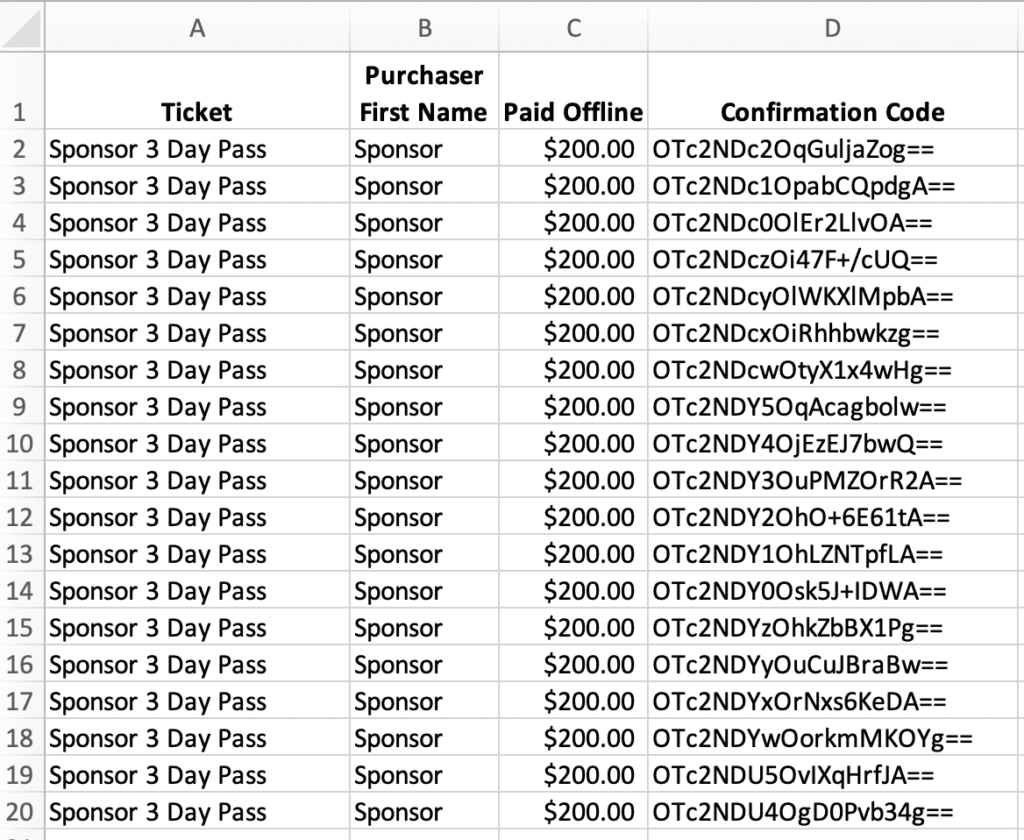
We set up a spreadsheet with 20 Sponsor tickets:
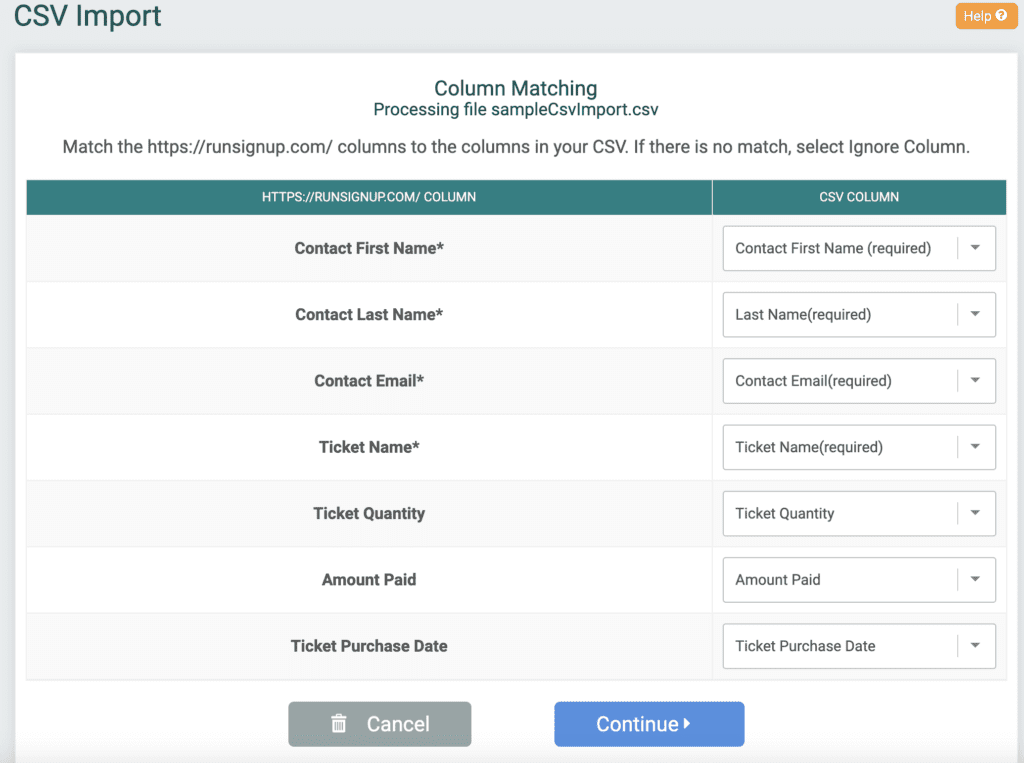
Once the spreadsheet is complete, then use the import tool on the TicketSignup Dashboard. Note there is flexibility to import different data with these fields since they will be used more for printing the field onto the tickets. For example, you might want to put a company name into the first name field to print a company name of a sponsor on each ticket:
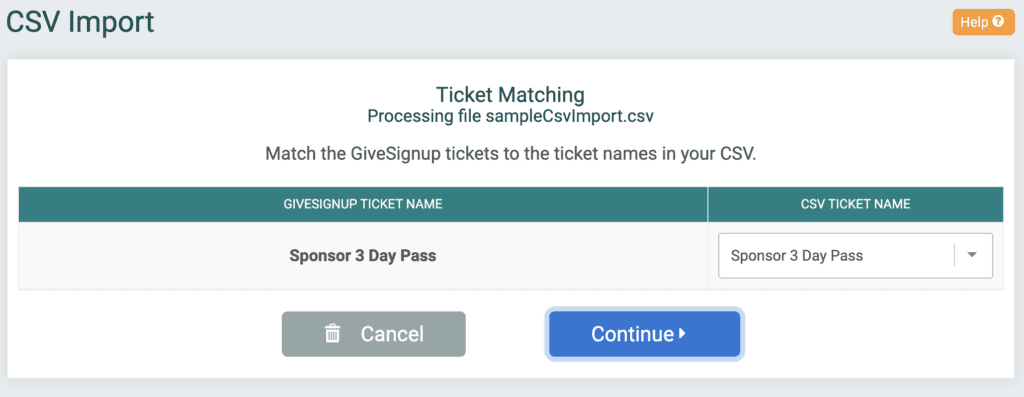
You also can match up ticket names set in your TicketSignup event to the name you might import. In our case, they are the same:
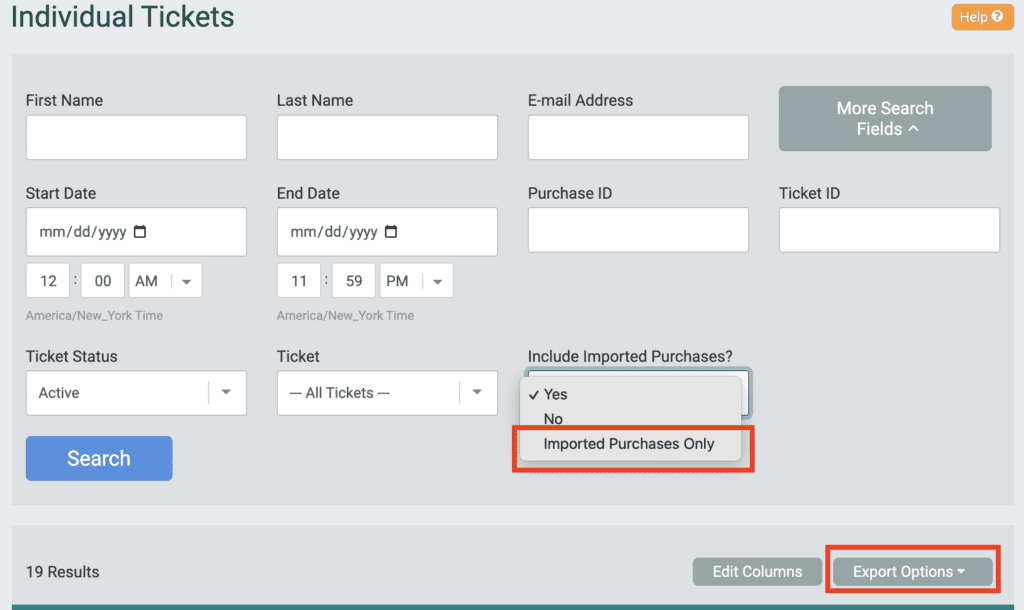
Once the import is complete, you will be able to see the imported tickets in your report (there is a nice option to only show imported tickets in the report:
Exporting Ticket Data
Today when you export the data, all of the data fields are exported (in the coming months we will add options to export only selected fields). So once exported, you probably want to go into Excel and delete the unused columns. Before removing columns:
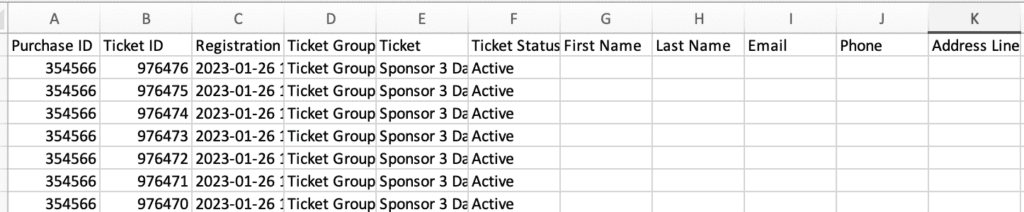
After removing columns, it is easy to see just the fields that we want to print on the tickets – Ticket Name (so it is easy to print a number of ticket types like 3 Day, Friday only, Saturday Only, etc.), Price (in this case so the sponsor sees the real value) and the Confirmation Code (which will be turned into a QR Code):
Avery Ticket Printing
We will show you how to use the exported confirmation code and other data to create custom tickets with the Avery Online tools. They have literally hundreds of options for ticket size and design:
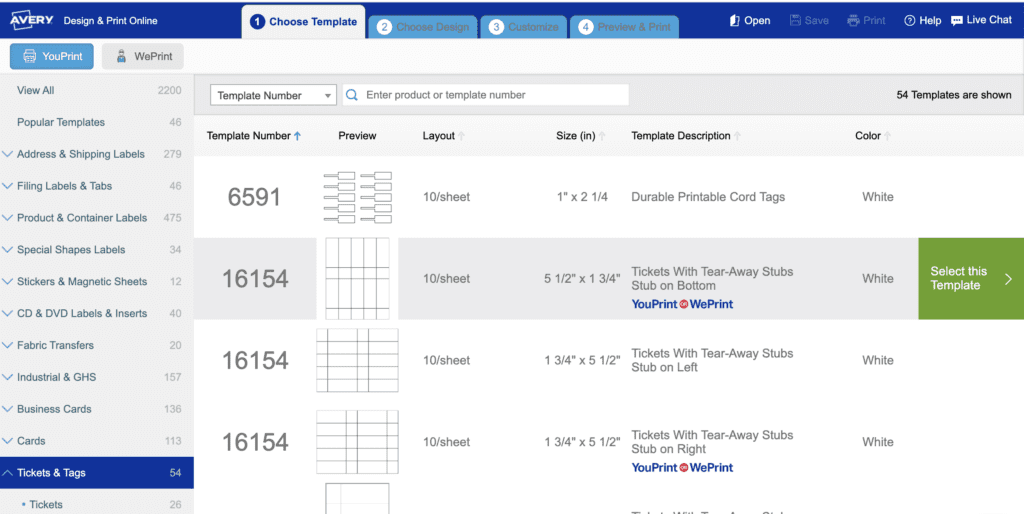
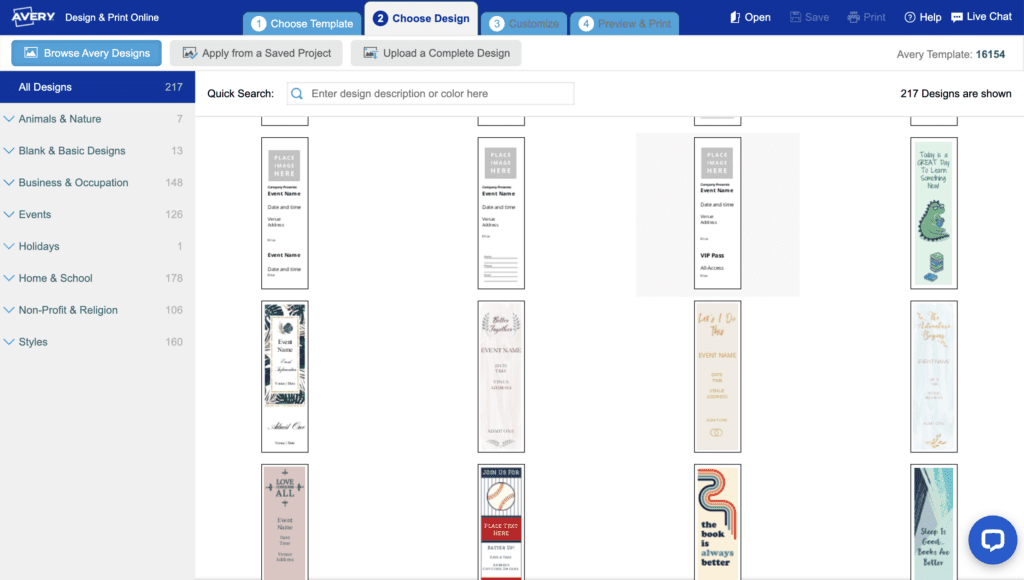
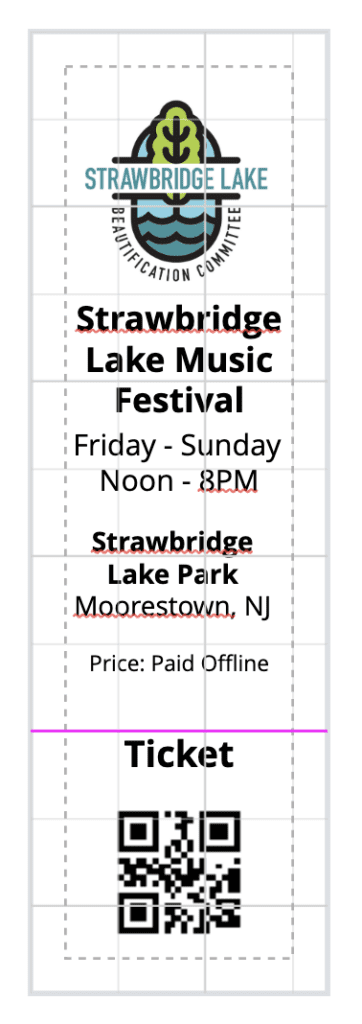
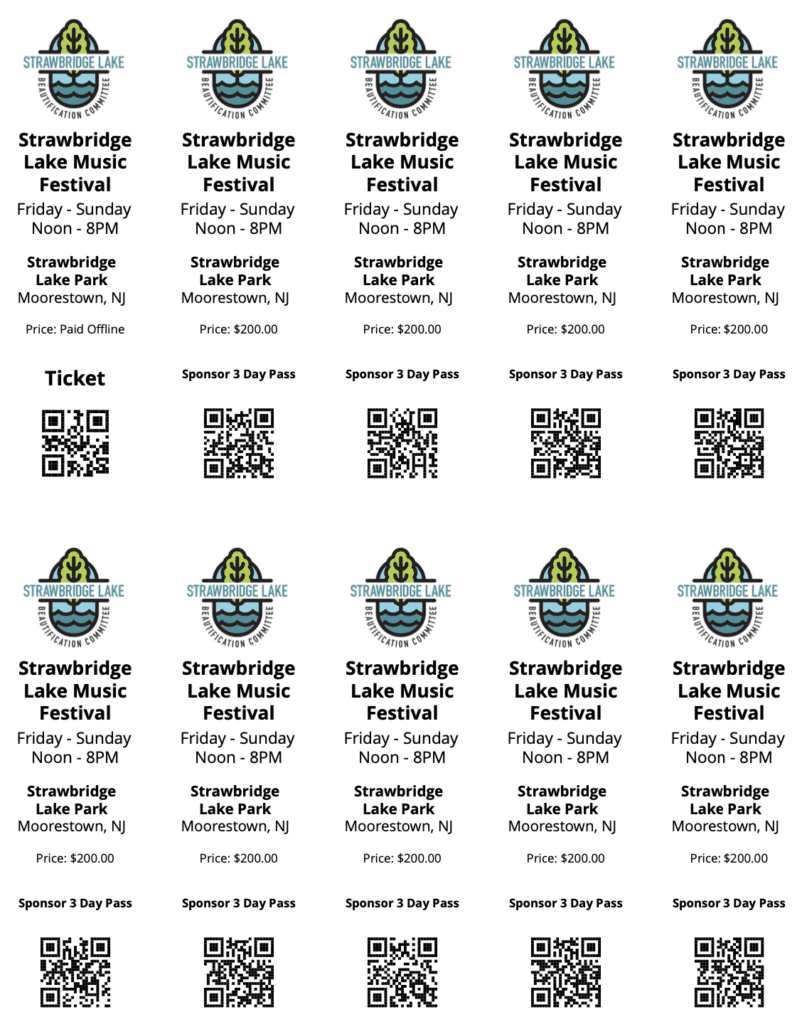
We picked a simple design that prints 2 rows of 5 tickets (5.5” x 1.75” – Avery #16154). It gives us options to print ourselves or have Avery print and ship. Once we picked that, it shows the default placeholders and design. It is simple to drag and drop these around on the ticket, to add or delete individual elements:

For example, to add your own image for the top block, click on it and then on the right upload an image:

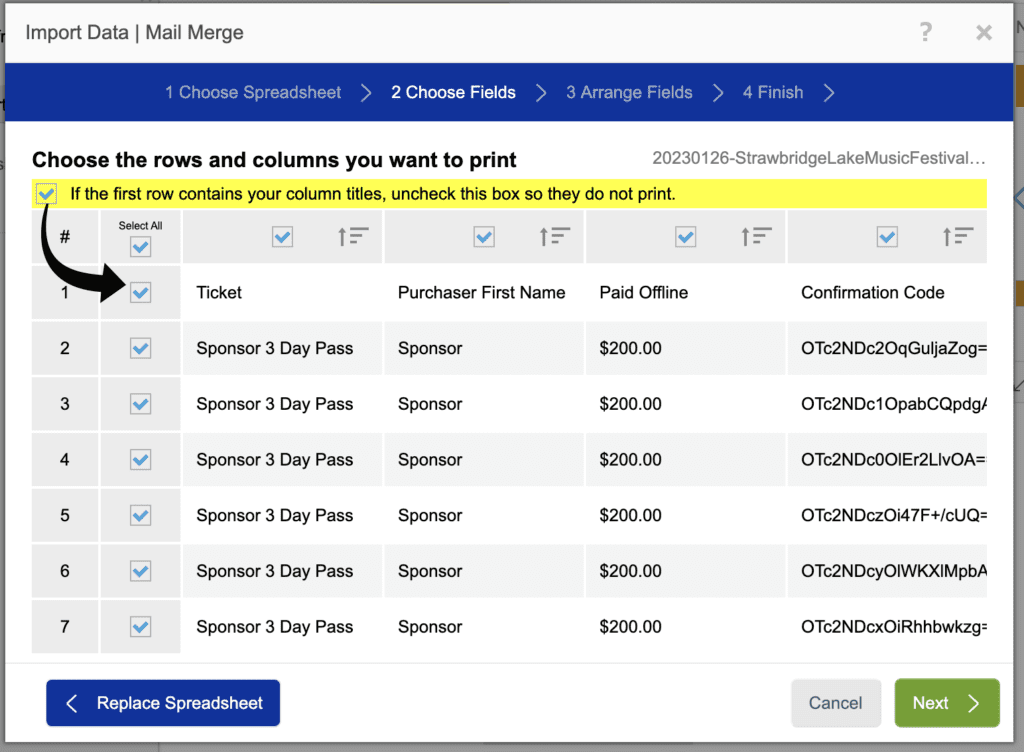
Import your spreadsheet by clicking on the “Import Data” tab on the right. It will show the data and you can choose which columns and rows to include or not. It is easiest to just include them all and then you will be able to use them later:
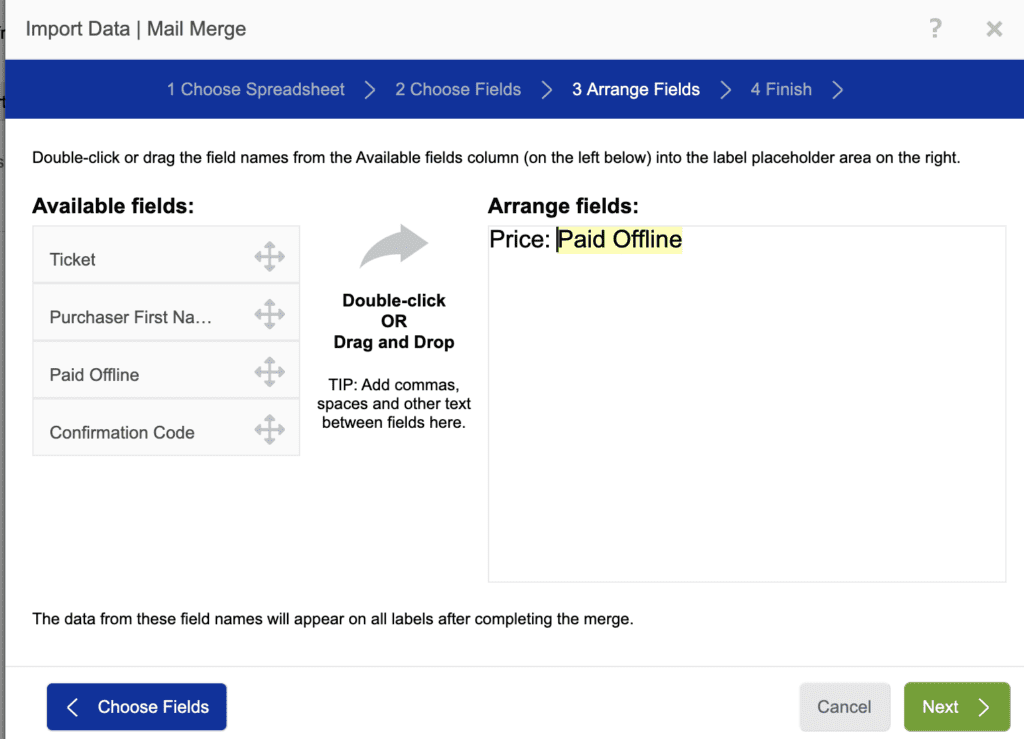
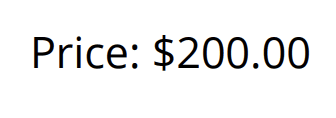
Once imported, you have the ability to put a “placeholder” into any of the fields in the ticket. You can also mix text and the data, like we did below where the static text is “Price: ” and then we drag and drop the “Paid Offline” data field and place it next to the price:
That will appear in the visual tool on the right like this:
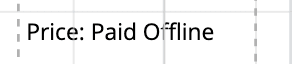
And then like this in the actual printed ticket:
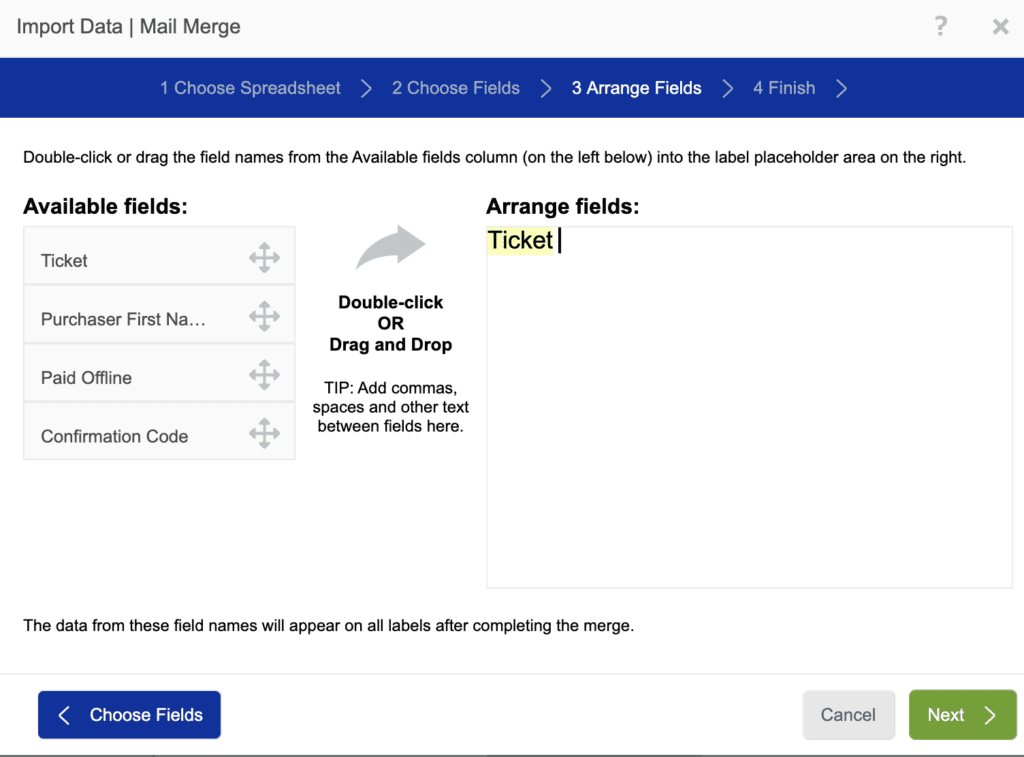
We did the same thing for Ticket by deleting a couple of the default text areas that came on the sample ticket and adding a field to put the Ticket Name that came from the spreadsheet. Again, a simple drag and drop:
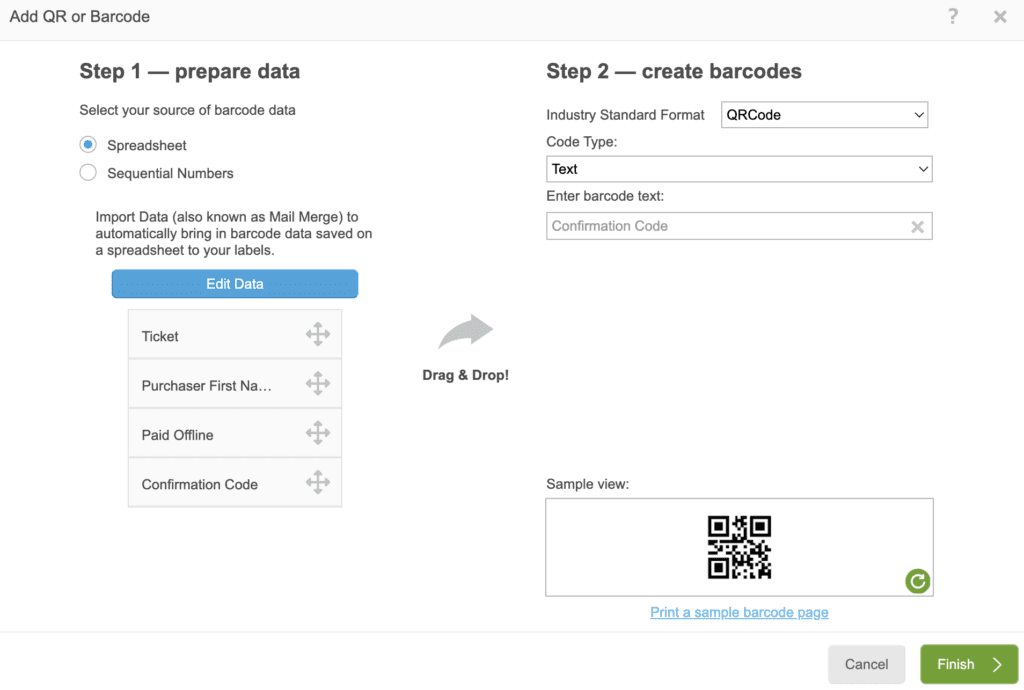
For the Bar Code, we need to choose the type – QR Code is probably the best option, although bar codes will work with our Ticket App for checkin just as well. Select QR Code in the option menu in the upper right, and then drag and drop the Confirmation data field over:
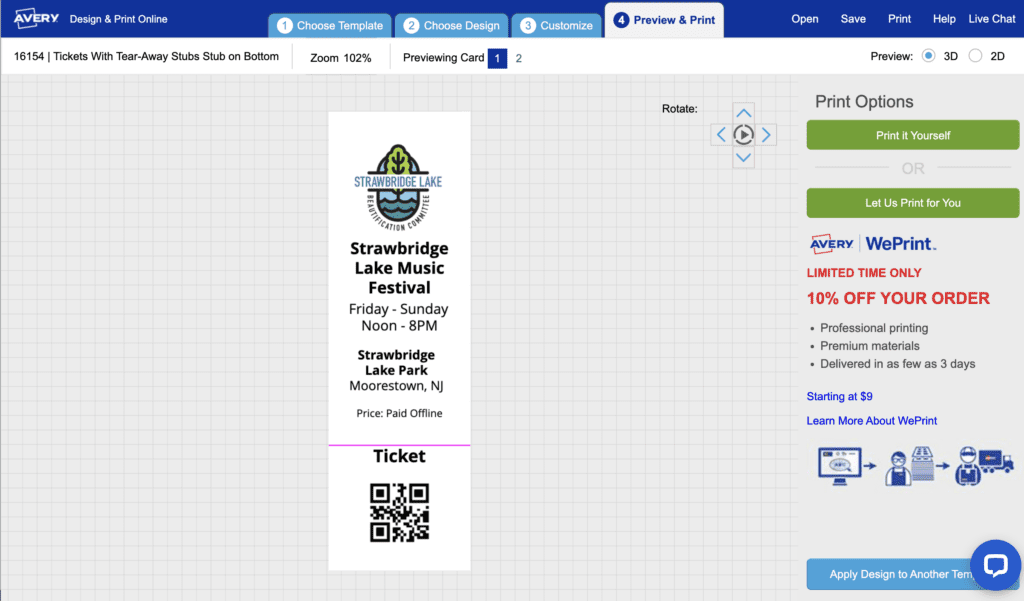
Next move and size the QR Code on the ticket – we put our sample at the bottom:
We are now ready to go to the next step of print or download:
The minimum order is for 60 tickets and the cost of our sample was $22.80. For an order of 1,000 tickets, the cost is $130:
The pdf option looks like this:
You can order the card stock from Avery with a simple Google search. In this example, the right form (16154) is found here for $13 for 200 blank tickets.