
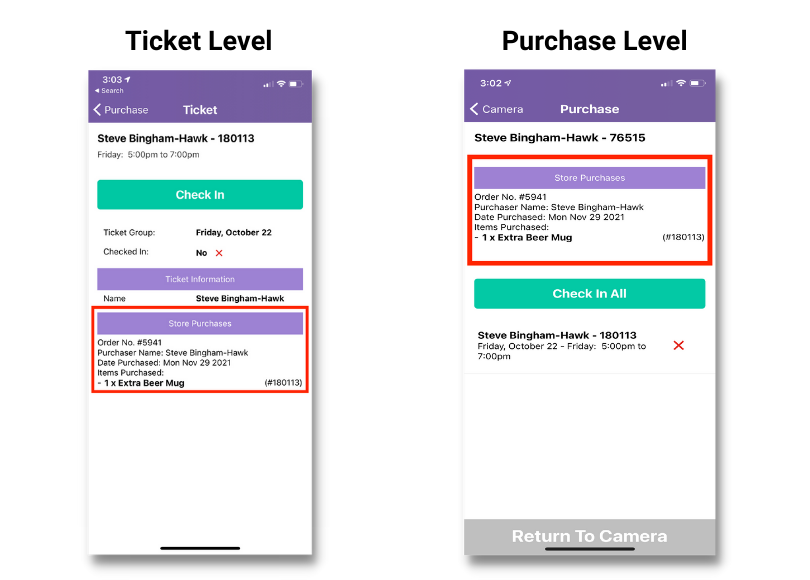
Organizations now have even more power and flexibility to control and manage ticket check-ins. Store purchases are now able to be displayed in the TicketSignup Tickets app during CheckIn. Staff and volunteers checking in tickets can quickly and easily view the quantity and type of store items. This will allow you to fulfill store items possible without any additional resources (no papers or computers necessary — you and your team can do it all on your phones)! Store purchases can be shown on both the purchase and individual ticket level.
First, Enable the Tickets App for CheckIn
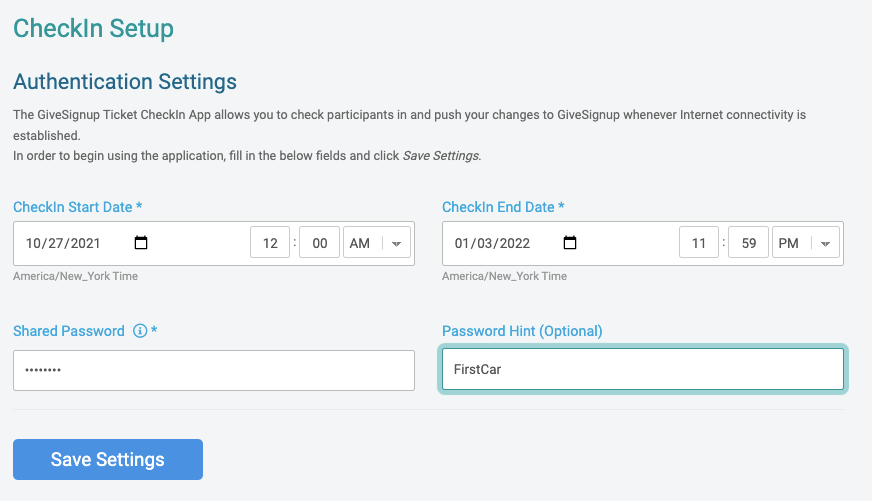
To get started, you’ll need to first enable the Tickets app for your event in your Ticket Event Dashboard. Navigate to Event >> CheckIn to set the dates for which the app should be available to use, along with the password needed to access the event within the app.
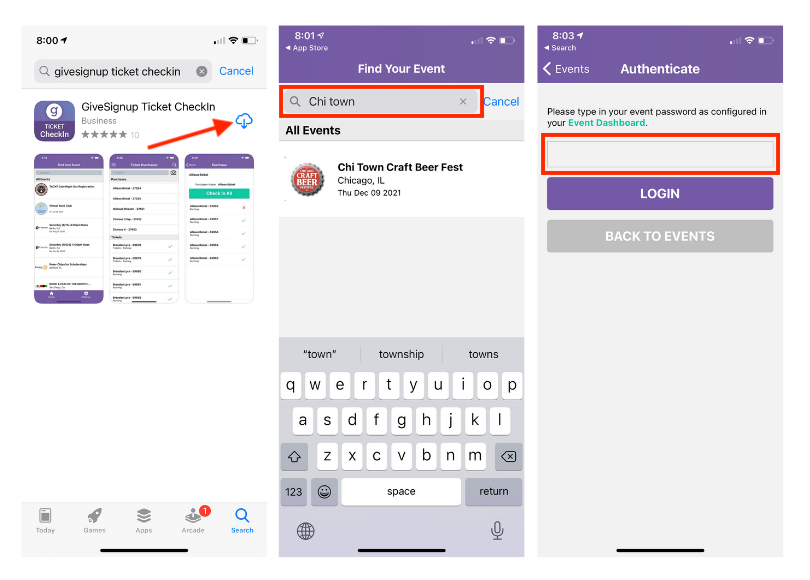
Your staff and/or volunteers will need to download the FREE app from their app store (available on both Android and Apple devices), search for the event, and enter the password.
Configure Event App Settings
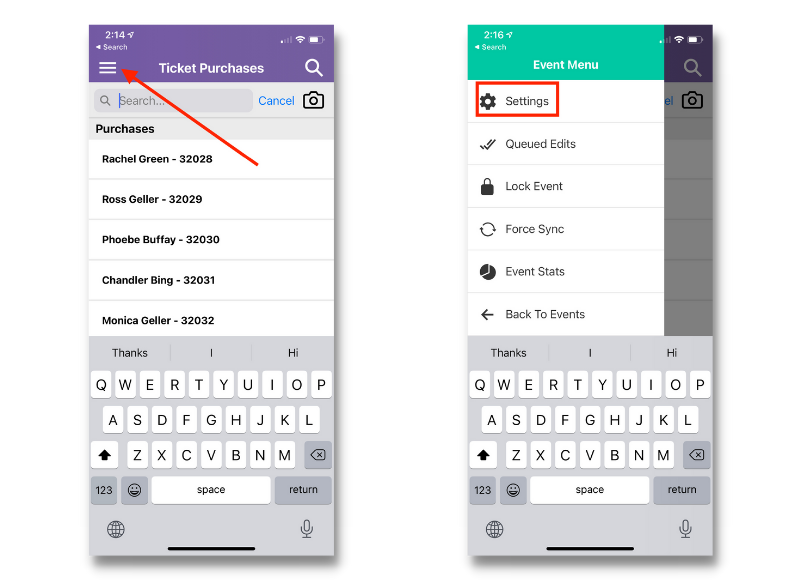
In order to have the items show, you will need to configure your settings within the ticket check-in app. If you haven’t done so already, download the free TicketSignup Tickets app to your Android or Apple mobile device. After opening the app, search for the event by name and enter the password you set up in your dashboard. Next, users will click on the hamburger menu at the top left-hand corner to expand the Event Menu. From the dropdown, select Settings.
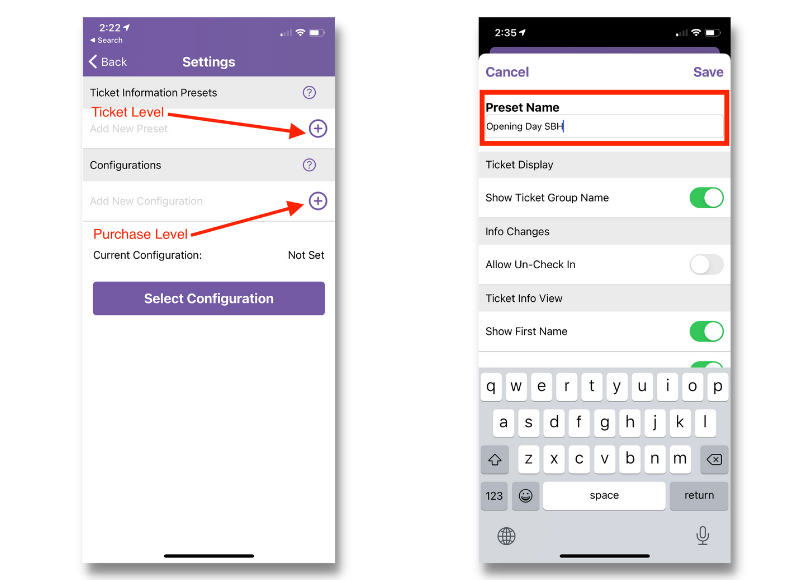
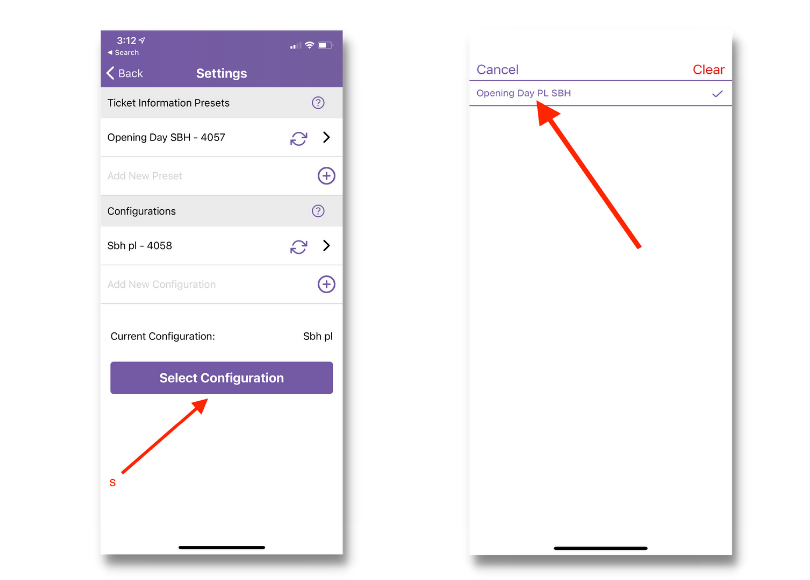
You will have the option to edit the configuration at both the ticket level (Ticket Information Presets) and at the purchase level (Configurations). To make edits, click on the plus symbol and name your new preset.
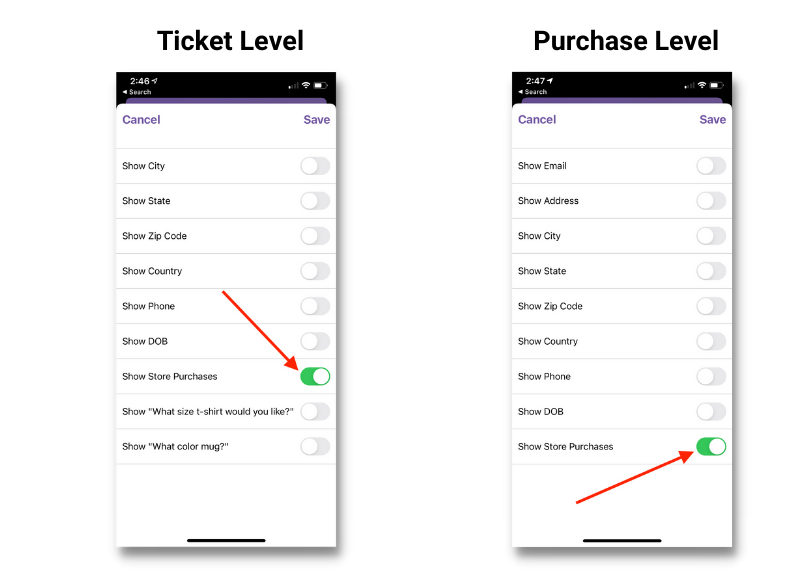
As you scroll down, you will see all of the fields available to display or hide including first name, last name, email, street address, city, state, zip code, country, phone, DOB, store purchases, and answers to any custom questions.
In addition, you have the ability to filter by specific tickets and ticket groups so that only specific tickets show for your volunteers and/or staff members. You can also hide tickets already checked in, which will update as the event takes place. Advanced ticket events can optimize the check-in process by hiding tickets for previous or future sessions. Overall, these customizations can reduce search times and the potential for error by selecting the wrong ticket.
Note: When you create presets, a pop-up asks if you want to upload and make the configuration available to other users.
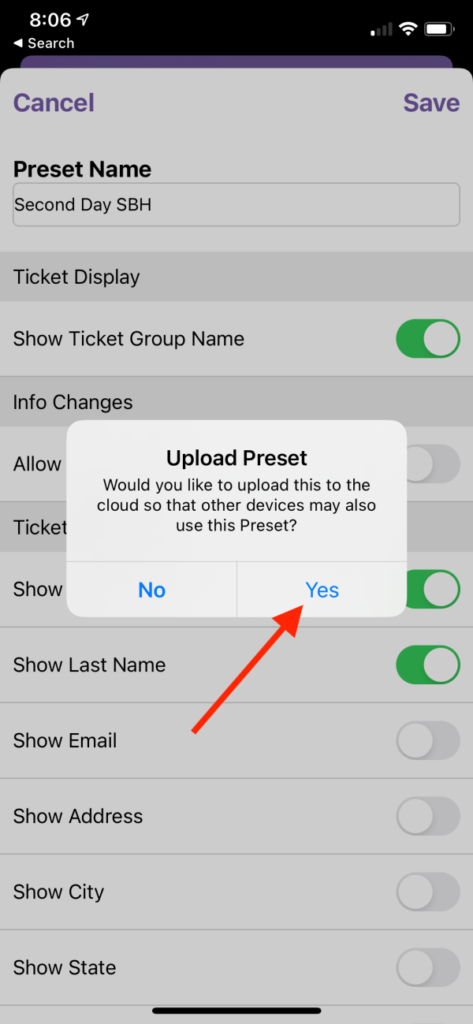
Click “Yes!” This feature is very helpful when using multiple devices on-site and saves time during your setup. After the first device is complete (and you clicked “yes” to the upload preset pop-up), you simply need to select the preset on the other devices to activate the settings you already configured.
Turn on Store Purchases Display
Toward the bottom of the list of fields to customize, you will see Show Store Options. Click on the toggle button to tell the app to display store purchases. It’s important to do this at both the ticket and purchase levels because your attendees may present your check-in team with a QR code for their purchase or their ticket.
Once changes have been made, be sure to click Save in the top right-hand corner.
To complete the setup, be sure to activate your new preset by clicking on the Select Configuration button and selecting the new preset.
And with that, setup is complete! You can now view your ticket purchases and individual tickets within the app and easily determine if a store item has been purchased in conjunction with a ticket.
Summary
Displaying store purchases in the TicketSignup Tickets App during CheckIn adds to an already valuable tool for you to successfully manage previously sold tickets on-site. Your guests will be impressed with the quick and easy way you check them in and fulfill their store purchases. A positive experience upon arrival at check-in sets the stage for a fun and stress-free event for attendees, keeping them open to your mission and giving opportunities.