
The start of 2022 ushers in an important milestone for TicketSignup’s Website Builder for ticket events! After releasing the tool, along with subsequent updates such as pages and menus, we are excited to announce that dropdowns and subpages are now live!
With this advancement, organizations can not only build beautiful websites, but organized ones that group related information and content together. The result is a professional and valuable resource for supporters interested in attending your event. And, because it’s integrated within your ticket purchase site, the time and effort of your supporters is significantly reduced. Even if you have a separate website for the event, the website builder allows you to house and organize content that can make a compelling case for purchase at the actual point of purchase. In this blog, we will cover the following:
Get Started — Navigate to Website Builder
Add New Dropdown
Add and Edit Content Sections
Rearrange Order of Pages and Subpages
Delete Dropdowns and Subpages
Dropdowns Without Subpages
Get Started — Navigate to Website Builder
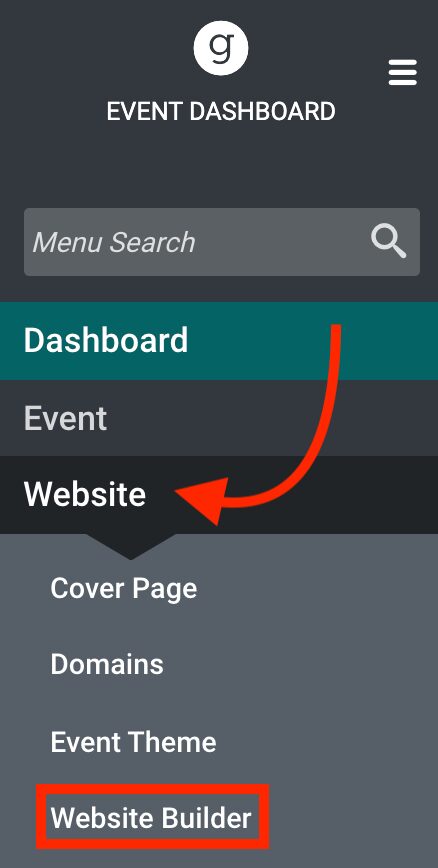
Open the Website Builder tool in your ticket event dashboard by going to Website >> Website Builder.
Add New Dropdown
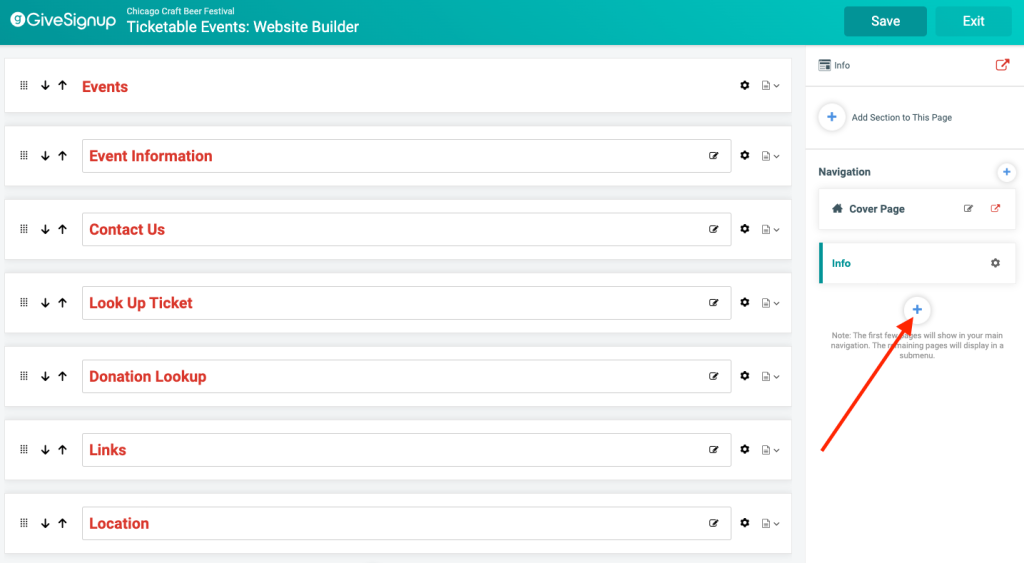
On the right sidebar, click on the plus symbol to add a new dropdown. Note: This is also the same place where you will start to add standalone pages.
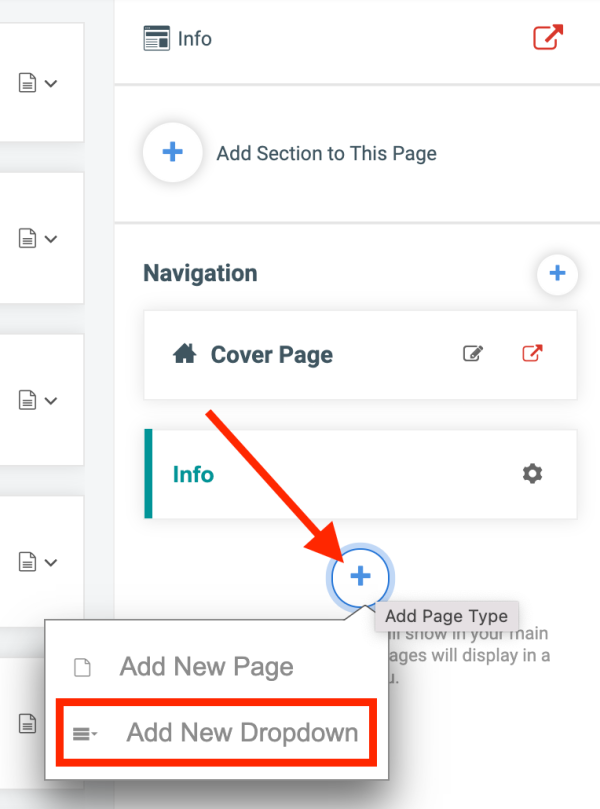
In the dropdown that appears, you’ll notice two options: “Add New Page” and “Add New Dropdown.” Select “Add New Dropdown” to start building your sub pages. A dropdown represents a group of related pages organized under a descriptive heading.
A pop-up will appear with several options for configuring the header of the dropdown. You can change the title, hide the dropdown, and set the date on which the dropdown will be live and visible to the public.
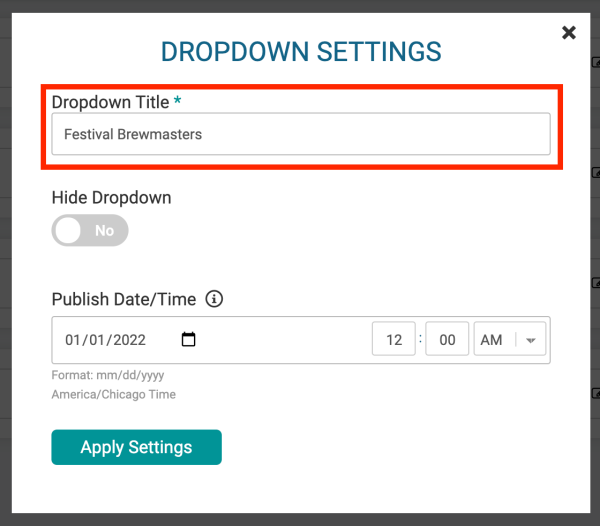
Note: The date and time settings are applied according to the time zone in which the event takes place.
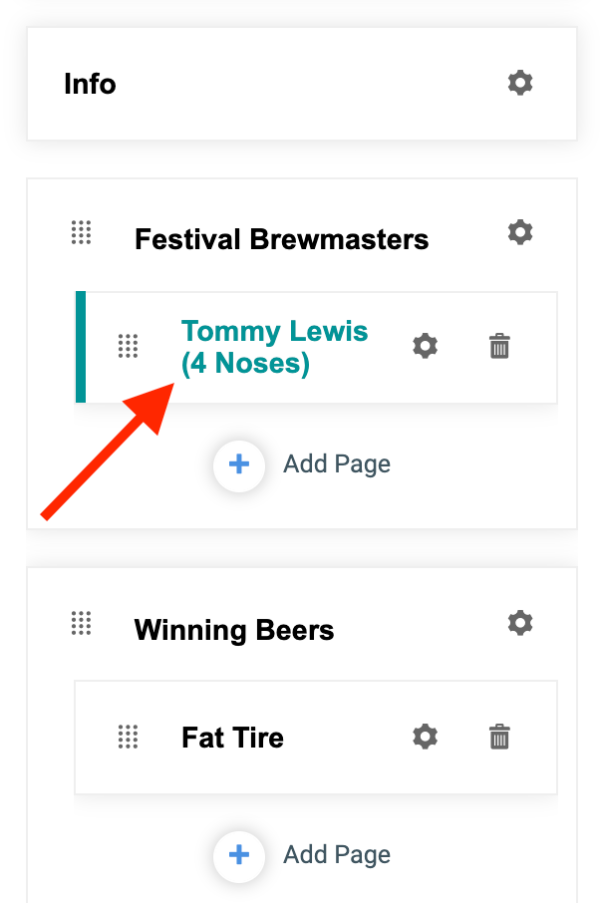
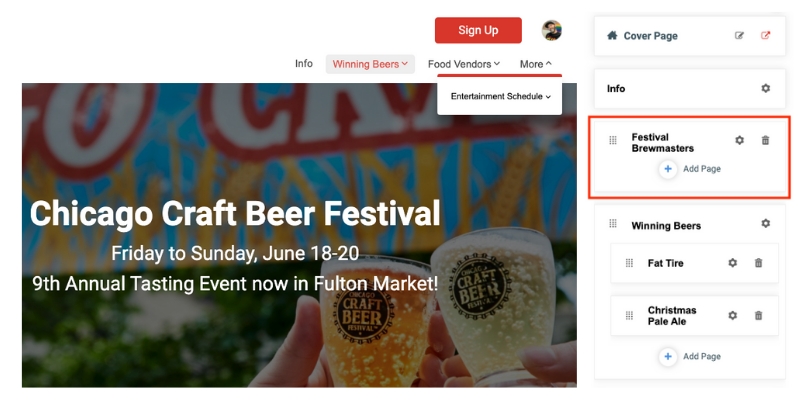
After successfully creating the dropdown, you will notice that two items have been generated:
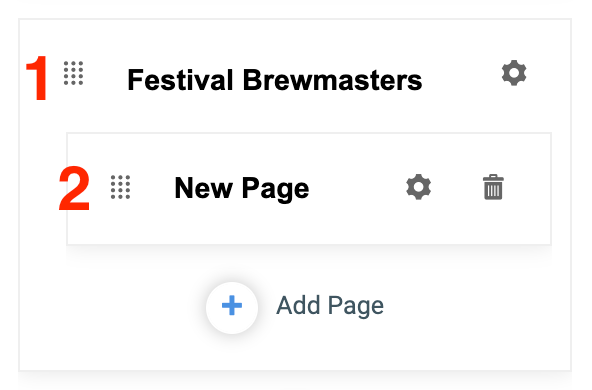
No. 1 is the top-level menu header for your dropdown, while No. 2 is the first page that appears in the dropdown menu.
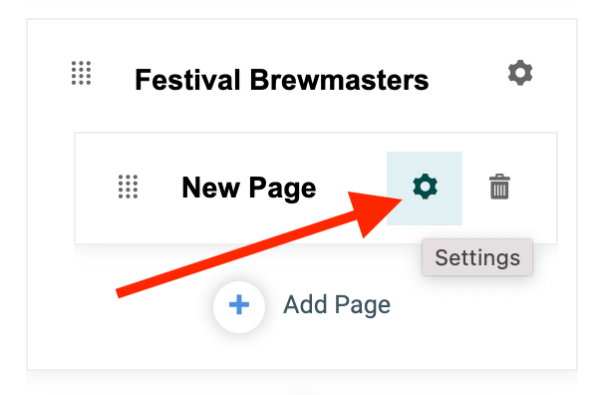
To edit the name of the newly created subpage and configure additional settings, click on the settings icon.
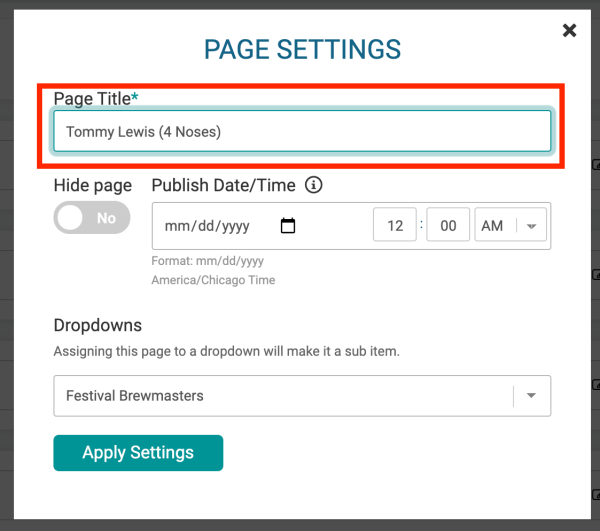
Here, you can change the page title, visibility, live date, and the dropdown heading you want the page to appear under.
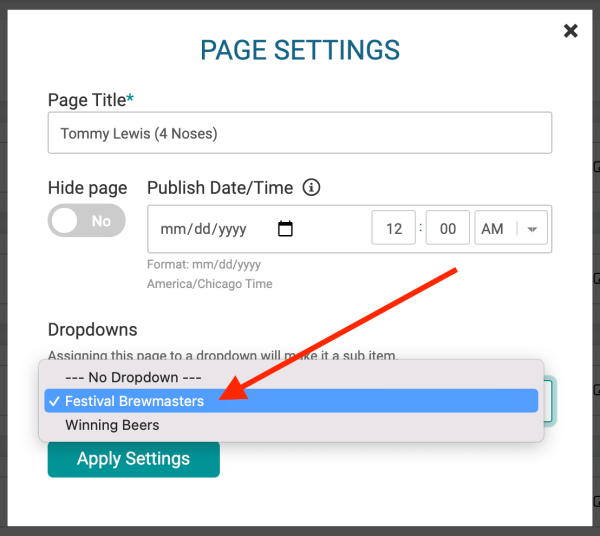
You can quickly move pages under different top-level menus by selecting a new header from the dropdown.
Add and Edit Content Sections
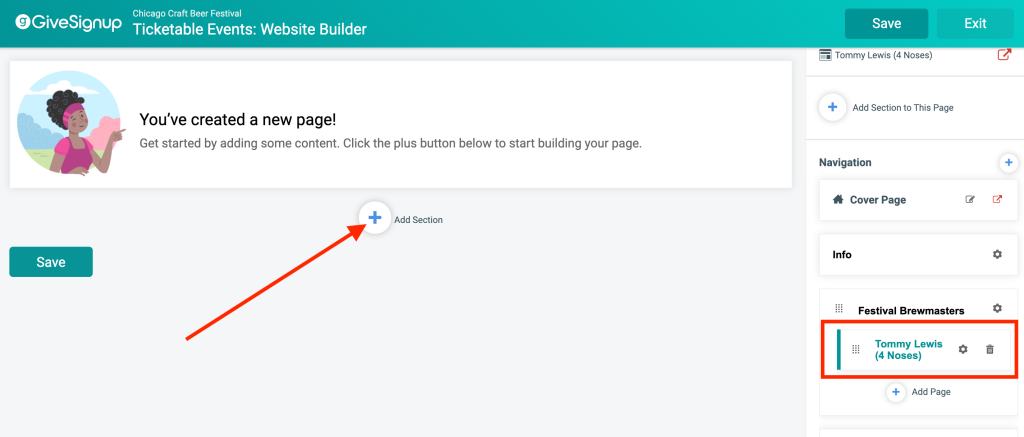
To edit a new subpage and add content, click on the name of the page and a green bar will appear to indicate which page is being edited.
Now, you are ready to customize each new page by adding sections that can host single or multiple content blocks. You can organize each section within one or two columns.
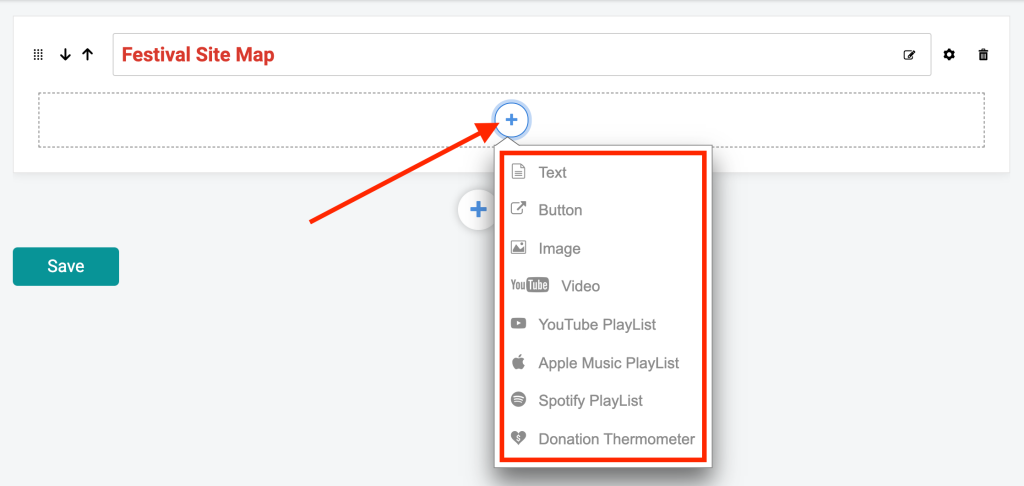
Under each section, you have the ability to add content, including text, images, buttons, YouTube videos, Spotify playlists, donation goal thermometers, and more.
Rearrange Order of Pages and Subpages
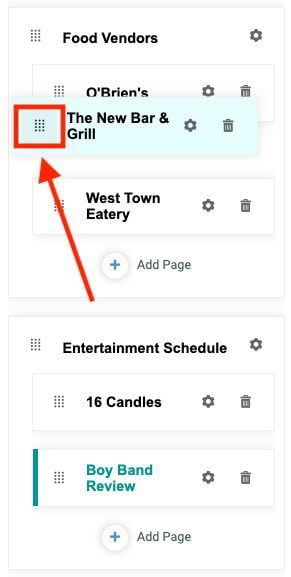
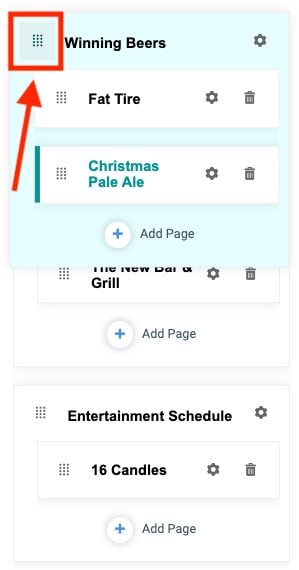
Now that you have created dropdowns with subpages, you can easily rearrange the order that your dropdowns appear in your menu header, along with the standalone pages. There are drag-and-drop handles on the left side of each page dropdown and subpage tiles to easily move pages around to prioritize and highlight specific content.
When you click and drag the tile handle, the element (page, subpage, or dropdown group) you are moving will highlight and move together.
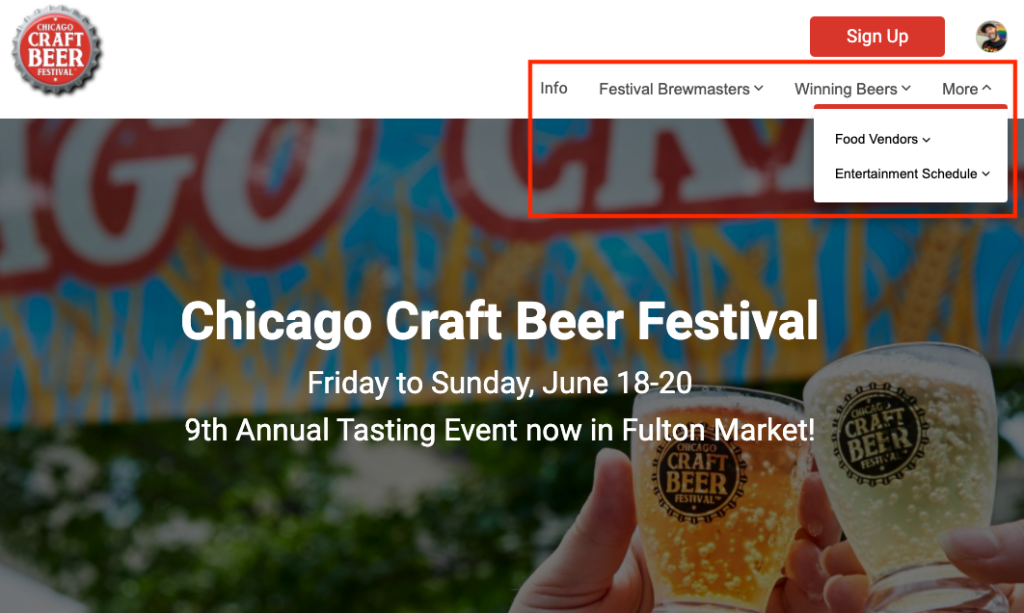
The first few pages and/or dropdowns will show in your main navigation. The remaining pages will display in a submenu. The system automatically makes this determination based on the number of characters used in the title of each standalone page and dropdown. Adjust the length of the names and drag to rearrange the order of dropdowns and pages to achieve your desired layout.
Delete Dropdowns and Subpages
Like standalone pages, subpages can be deleted by clicking on the trash can icon for the subpage you wish to remove.
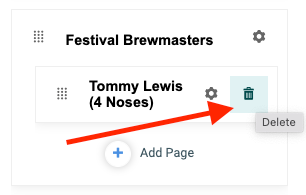
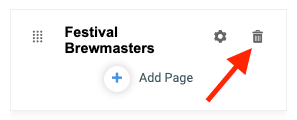
In order to delete a dropdown, you must delete its subpages or move the subpages to another dropdown menu. You’ll note in the screenshot above that the trash can icon does not appear for the dropdown menu header, “Festival Brewmasters” because the “Tommy Lewis (4 Noses)” subpage is still nested under it. In the screenshot below, the subpage has been removed and the trash can icon now appears the dropdown header can be deleted.
Dropdowns Without Subpages
Reminder: The dropdown menu header is only a heading. It is not a page that hosts content. If no subpages are attached to the header, it will not appear on your TicketSignup site. However, it will remain in your website builder for you to assign other subpages to it or it can be deleted.
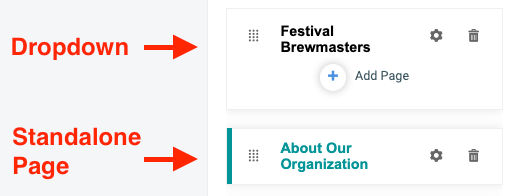
You can identify if a tile in your website builder is a standalone page or a dropdown by looking below its title. If a plus symbol displays within its container below the name, it’s a dropdown. No plus symbol? It’s a standalone page in which you can add content.
Data Components Coming Next
When you add a cover page to your website, you can choose to display different data components, like a donation goal or top fundraisers. We will add the ability for your organization to display these components and more on any page and custom section. This lets your website run on autopilot, with items like dates, price increases, donation goals, fundraiser leaderboards, photos, and more, automatically updating without you making website updates.
TicketSignup’s new Website Builder gives you a free and easy way to design websites for each ticket event. Feature your brand and your mission with a free website that’s seamlessly integrated with ticket sales, donations, and your event data.