TicketSignup’s Website Builder for ticket events gives events the ability to design and build their own high-quality event website in minutes.
We are excited to announce that webpages and menus are now available within the Website Builder for TicketSignup events. In addition to being able to add valuable content, like images and call-to-action buttons, events can now add unlimited pages to their ticket event websites in any order of appearance in the menu header. This enhancement boosts the potential to create beautiful and professional websites that integrate with your revenue-producing tools on TicketSignup. You can display and organize valuable information and ways to engage, allowing your event page to act as a standalone website that could save your organization valuable time and money.
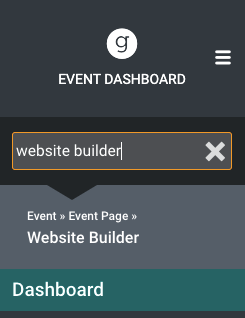
Navigate to the Website Builder from your dashboard by going to Website >> Website Builder. Or, just type “Website Builder” into the menu search on your Website Dashboard. Then, click the link to go to the Website Builder.
Edit Default Info Page
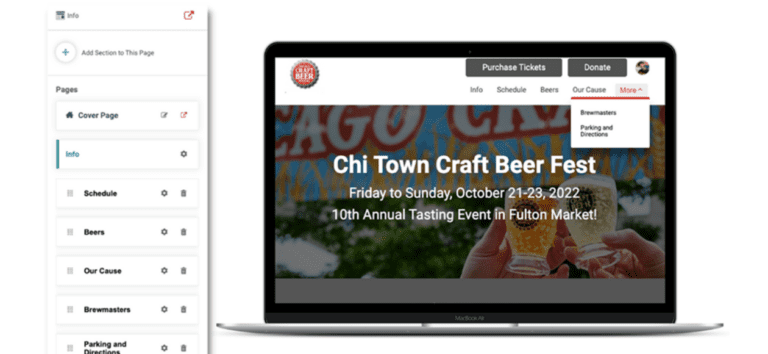
The first screen you will see shows you the default Info page that has previously been available and displayed as the only menu option. It houses content you provided in the Setup Wizard, covering the basic details and actions a donor or ticket purchaser can complete (look up ticket, look up donation, and questions). You can add additional sections of content to the Info page from the landing page of the Website Builder.
Add Unlimited Pages
Now, the cool part: On the right side of the Website Builder, you are able to add additional pages to your ticket event website. Use these pages to organize information about your organization, specific details about your event (parking, schedule, etc), other upcoming events, and more ways to engage with you. There are also opportunities to bring attention to specific areas your event organization would like to highlight:
- Thank your sponsors and bring attention to your community partners.
- Provide a recap of the previous year’s event
- Link directly to a photo album from a previous year
- Thank donors and volunteers.
The possibilities are endless. No, really! You can add unlimited pages to your TicketSignup event websites.
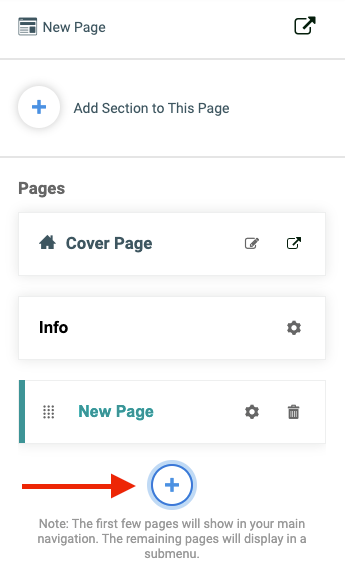
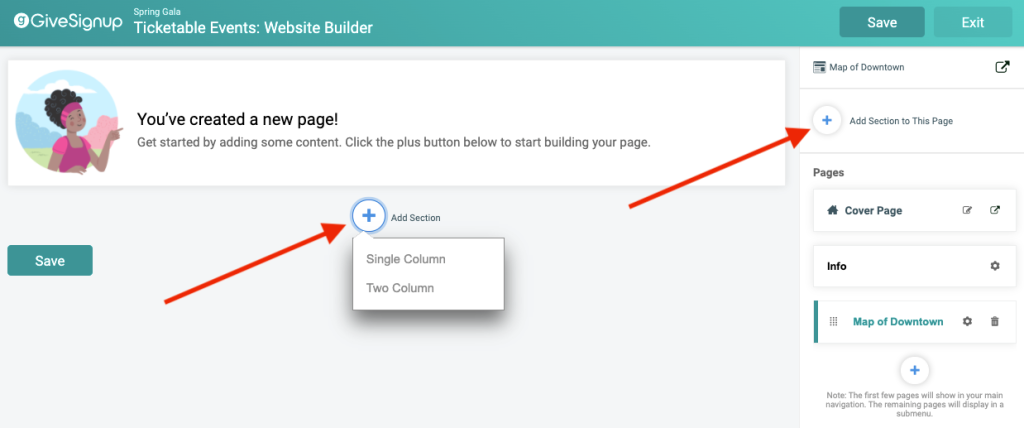
To add a page, simply click on the plus symbol on the right side of your dashboard and below the Info page tile.
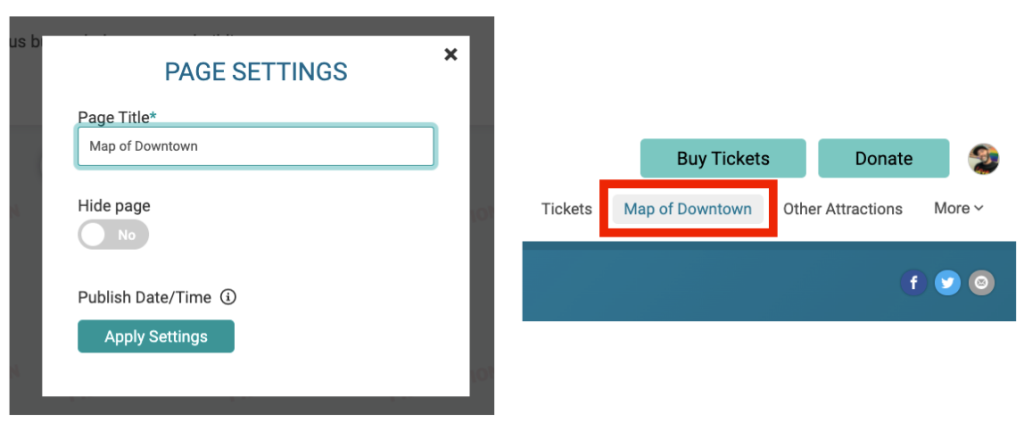
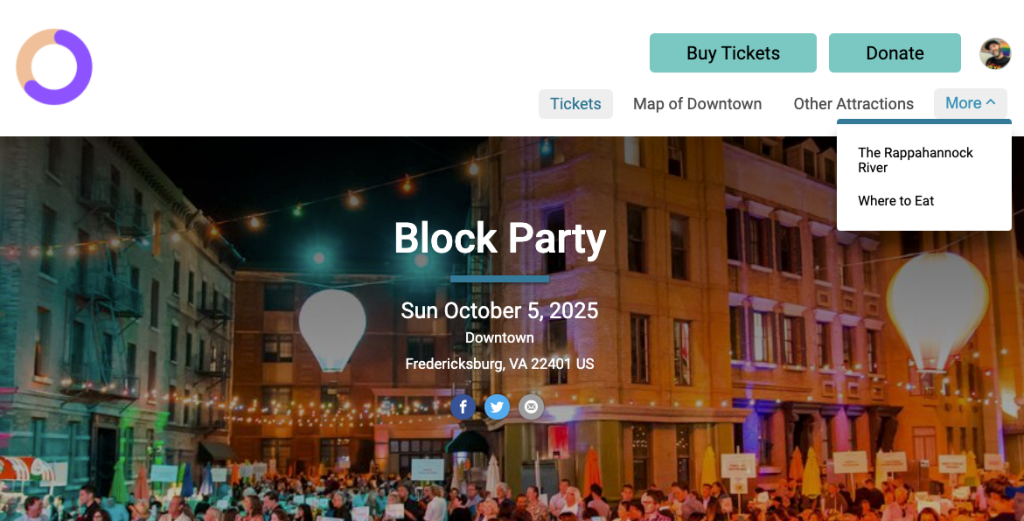
A pop-up will appear that allows you to name the page and set the visibility of the page. The page title you enter will also serve as the menu label that will appear in the menu header at the top of your ticket event website.
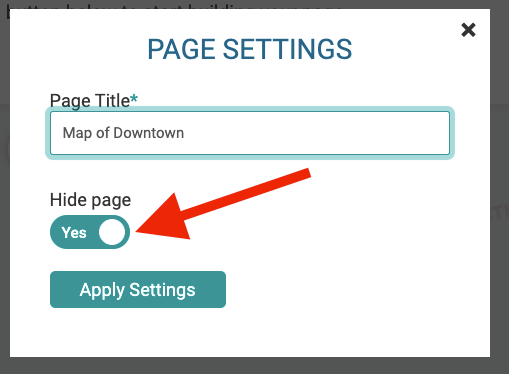
Toggle on Hide Page if you do not want your page to be live on your site yet. This option allows you to edit and try out different content in a safe “behind-the-scenes” environment.
Add and Edit Content Sections
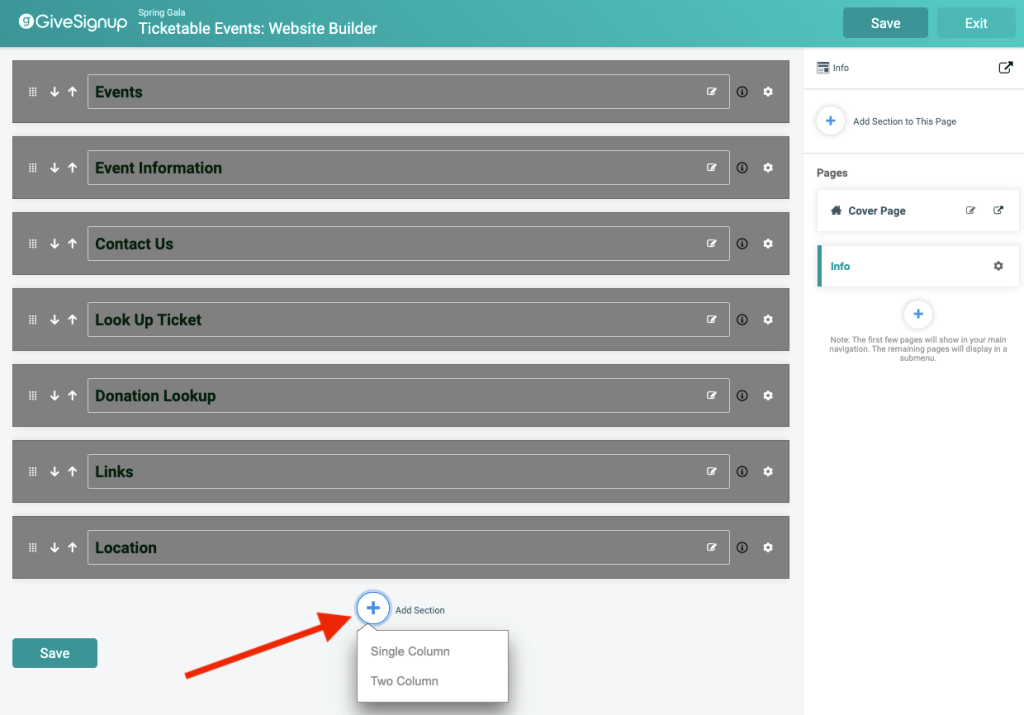
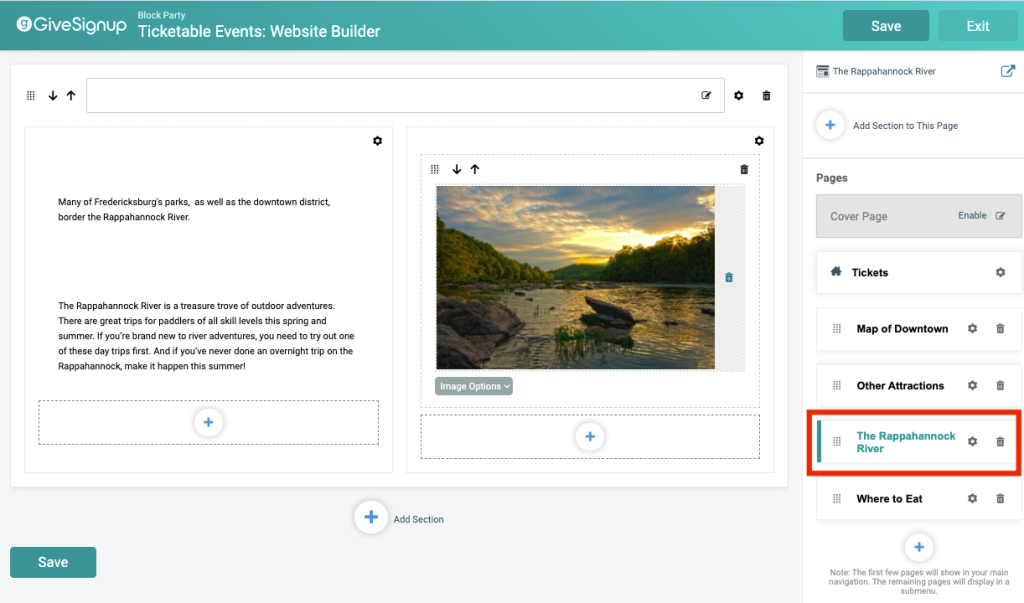
Now, it’s time to build! Like you saw with the default Info page, you can add content by clicking on the plus symbol on the left-hand side or at the top of the right sidebar. You can add a section with one or two columns.
For each new content block, customize the headline with simple and helpful text.
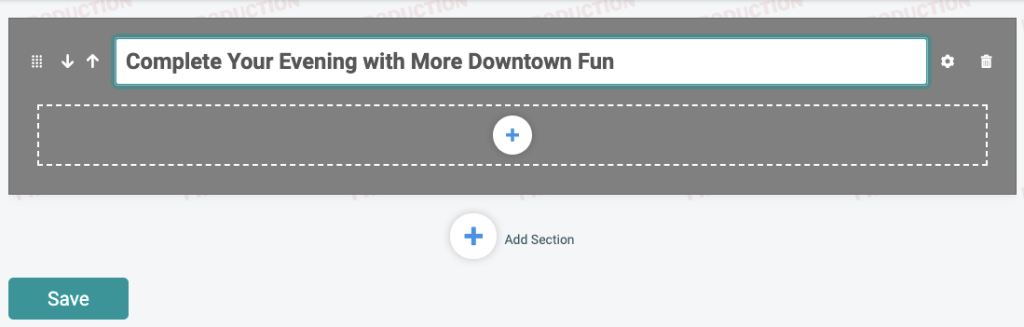
You will then add the content for the section by choosing between several options the appear in a drop-down after clicking on the plus symbol within the section.
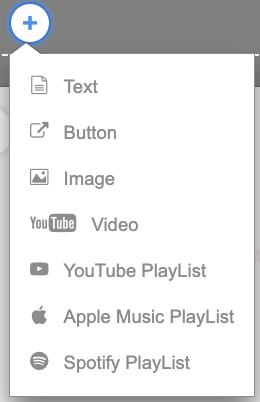
Note: You are not limited to just a single piece of content or even a single content type. You can add an unlimited number of content pieces within any given section.
For a step-by-step tutorial on how to add and edit content sections and content within each section, including text, buttons, images, videos, and playlists, check out our blog, “Introducing the TicketSignup Website Builder.”
Configure Page Settings
With your first page built, you can return to the page at any time to make changes or add additional content. Click on the name of the page on the right side of your dashboard to edit your content. You’ll notice that the page you selected is shown with green text and a vertical green bar.
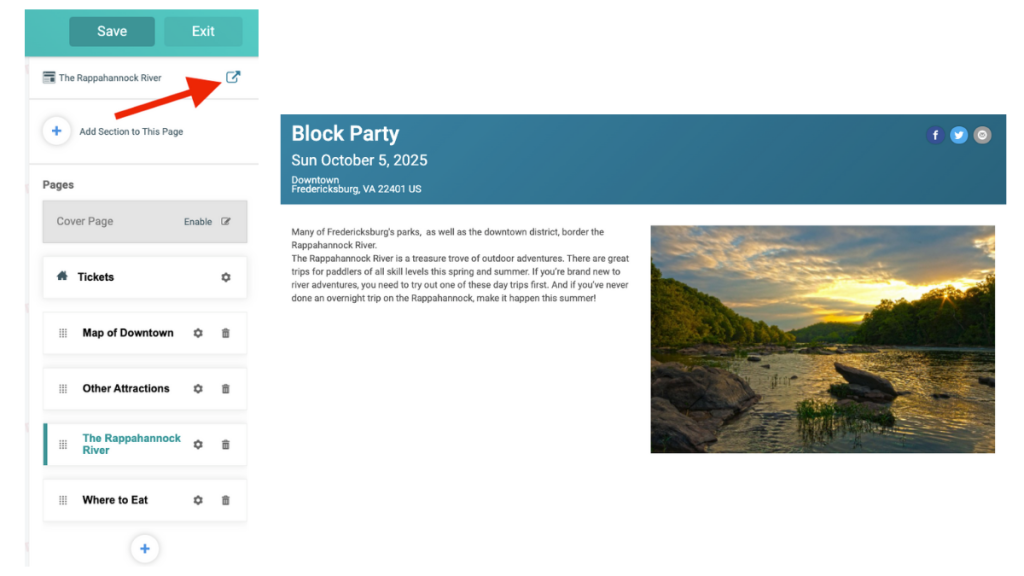
At the top, the name of the page will display with an icon that, when clicked, will take you to the actual page so you can view how it will appear on your ticket website.
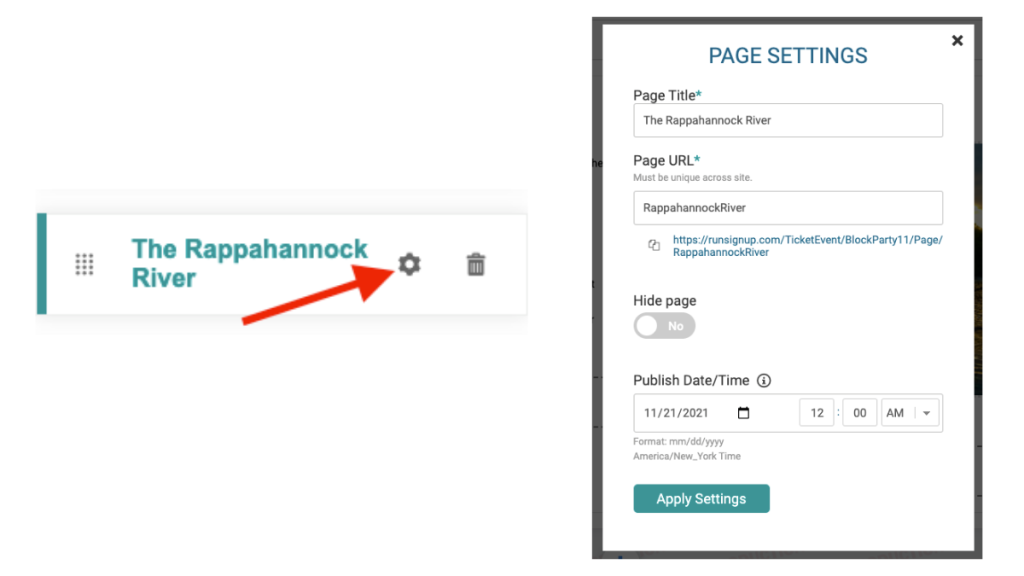
For further customization, click on the settings icon for the page you want to edit. There, you can rename the page title, customize the page’s URL, change its visibility, and indicate a date and time when you would like the page to be live on your ticket event website.
Menus: Rearrange Pages
Now that you have created additional pages, you can easily rearrange the order that your pages appear in your menu header. There are drag-and-drop handles on the left side of each page tile to easily move pages around to prioritize and highlight specific content.
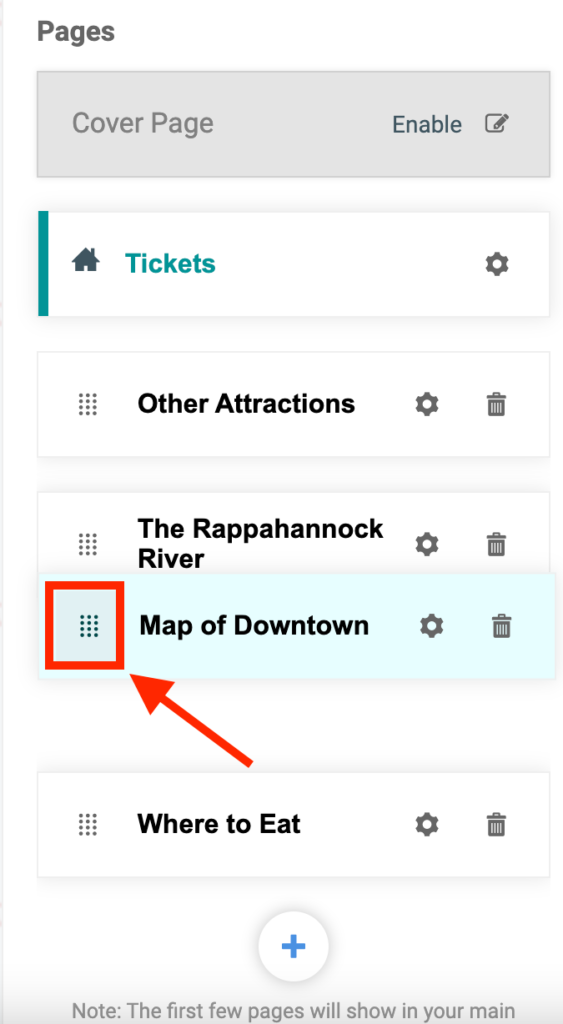
The first few pages will show in your main navigation. The remaining pages will display in a submenu.
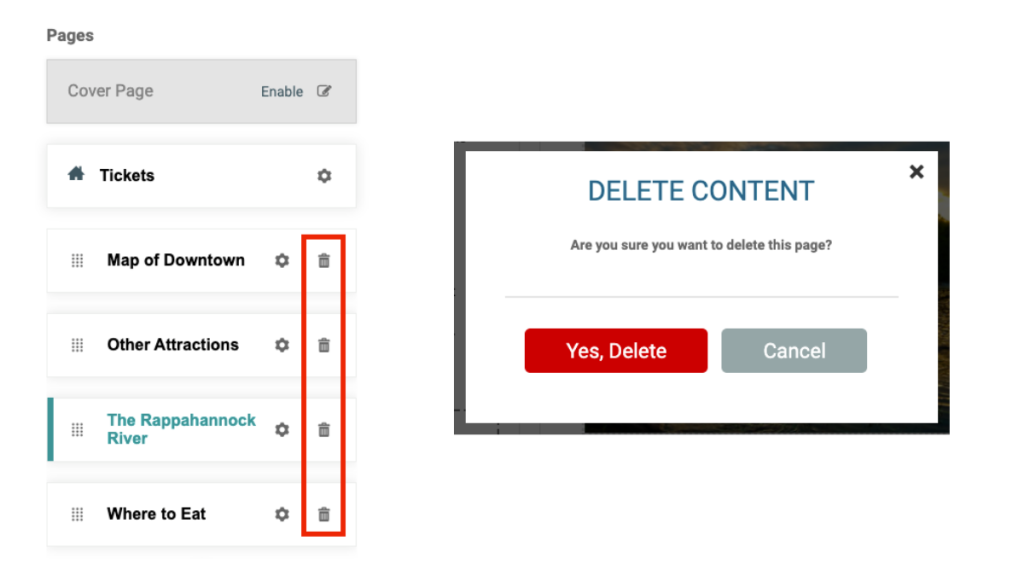
Delete Pages
To completely remove a page, click on the trash can icon for the page you want to delete and click on the Yes, Delete button on the pop-up that appears next.
Enable and Edit Cover Page
From the Website Builder, you can easily determine if you are using the default homepage layout or if you are using the cover page tool.
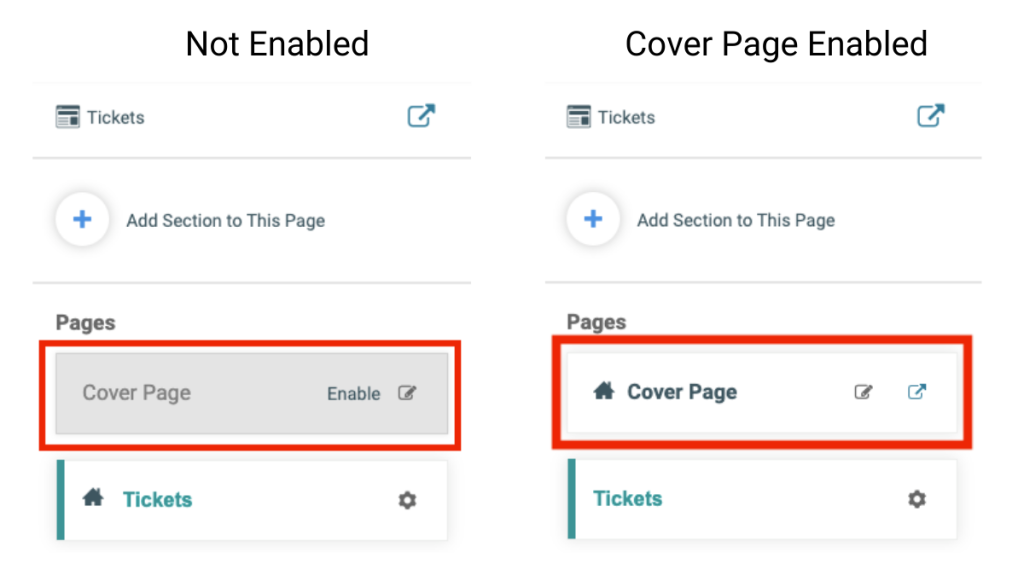
By clicking on the edit icon, you will be taken directly to the cover page settings to either enable, disable, or edit and add content. If enabled, the view in window icon button will show you how the cover page currently appears. Check out our “Ticket Event Cover Pages” blog about cover pages for ticket event websites, which includes a tutorial on how to set it up.
What’s Coming Next
There are many more features planned for the Website Builder to give your nonprofit even more design and custom website capabilities. Here is what is coming in the next six months:
- Submenu Items for Menu Header: You will be able to organize the pages you built from this blog and nest them under each other or other relevant menu titles. With this enhancement, your TicketSignup website will rise to a new level of professionalism and ease of use for your attendees.
- Data Components: When you add a cover page to your website, you can choose to display different data components, like a donation goal or top fundraisers. We will add the ability for your nonprofit to display these components and more on any page and custom section. This lets your website run on autopilot, with items like dates, price increases, donation goals, fundraiser leaderboards, photos, and more automatically updating without manual website updates.