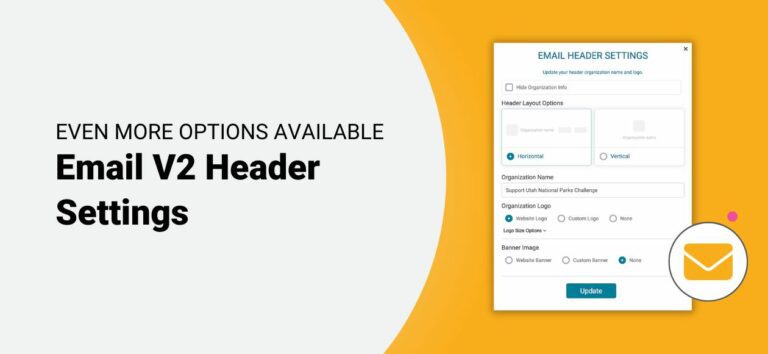
In addition to custom footer settings, you now have more flexible design options for all email headers. The default header setting displays your logo, event name, Sign Up call to action button, and Donate call to action button (if donations are enabled). There are even more options available now.

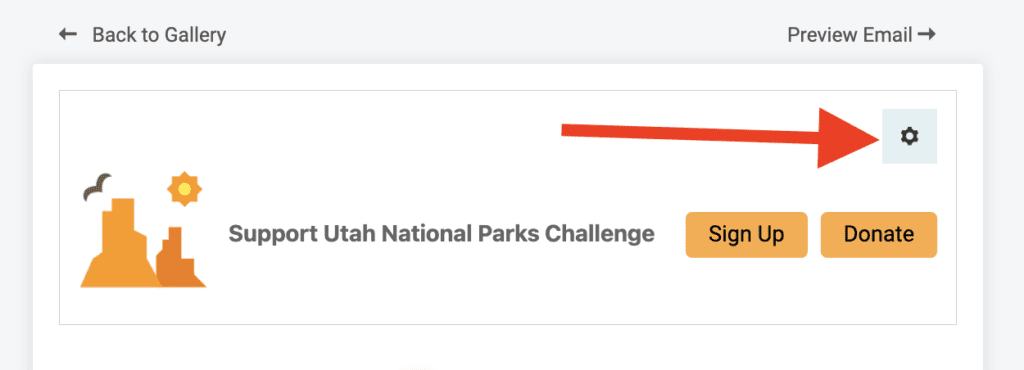
To customize the header, click the settings gear in the corner of the email header.
Now you can customize the following:
- Disable the header: This will hide the header from your emails. The top of the email will begin with your first content block.
- Layout Options: Choose whether you want a horizontal display (shows the call to action buttons) or vertical display (hides the call to action buttons).
- Organization Name: This shows the event name by default. While you cannot leave this field blank unless you disable the header, you can replace with a different name like your company or nonprofit’s name rather than the event name.
- Logo: Use your event logo, upload a custom logo for the email header, or hide the logo entirely.
- Logo Size Options: If using a logo, choose whether you want the image to display as small, medium, or large. It is set to medium by default.
- Banner Image: Feature your website’s banner images in your emails by enabling for the email header. Or upload a custom banner to use instead.