
Email for Ticket Events is here!
As part of our ongoing deployment of new feature releases, we are pleased to announce the incorporation of additional customizations that will enhance your ability to communicate most effectively with an important group of your supporter base – your event attendees!
Today, we are excited to share these additional features just released for our still-fresh email tool:
- Combining of custom and default contact lists to dynamically include or exclude specific individuals or groups in real-time for immediate and scheduled emails.
- Default data replacement tags that allow you to insert personalized information automatically into emails to your ticket purchasers and ticket holders.
- QR codes for ticket purchases to include in pre-event emails to facilitate fast and on-site ticket processing using the TicketSignup CheckIn app.
This blog will serve to show you how to start an email from scratch using our new email tool and then arm you with three key communications every ticketed event should send to their ticket purchasers and ticket holders.
- Event Invite to custom supporter lists
- Last-chance marketing email to those who have not yet bought tickets
- Pre-event email with important event details and instructions
Let’s get started!
How To Set Up, Create and Send an Email
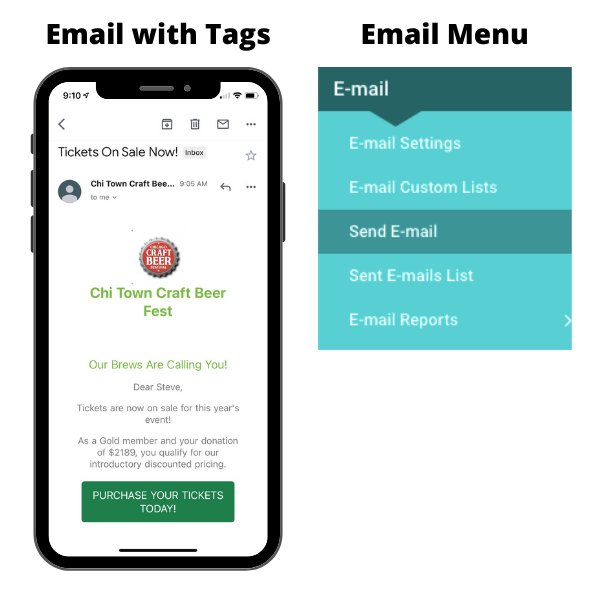
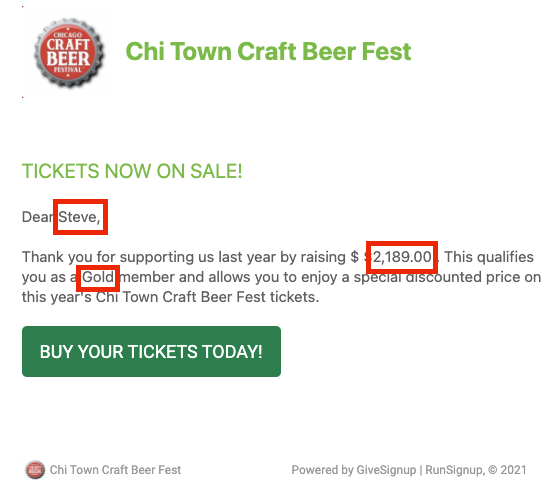
Here is an example email on an iPhone that includes custom tags, like “First Name,” “Number of Years Attended” and “Previous Donation”:
Configure Email Settings
The above menu on the right shows in your Tickets Website Dashboard. You will have to set up your basic email parameters, which are pretty simple — the Reply-To Address and the name that shows for the From and Reply-To:
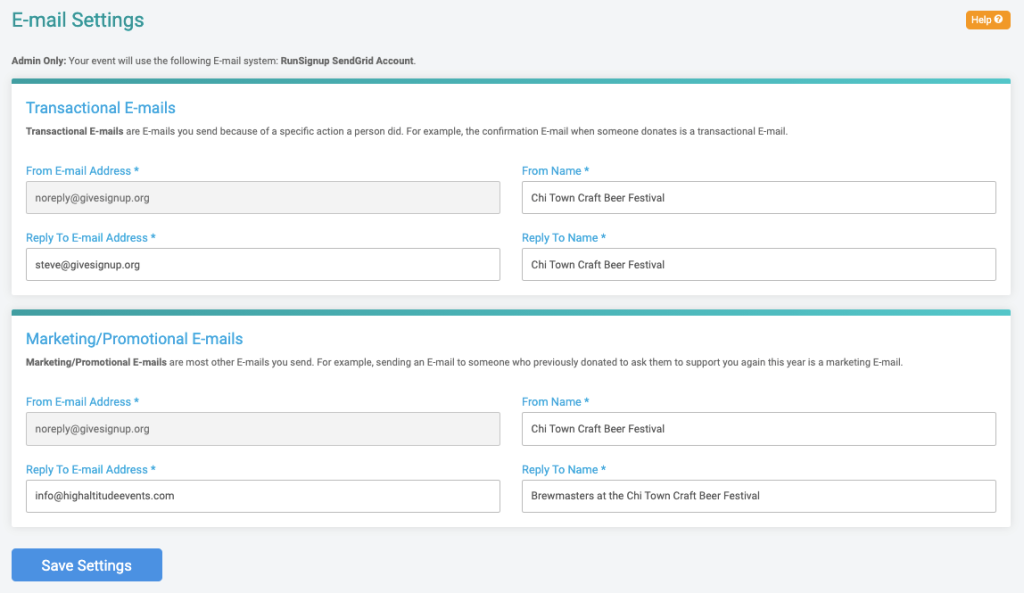
Note that we give you two email accounts: one for marketing purposes and one for transactional purposes. This allows you to send marketing emails and have people unsubscribe from those, but when you want to send something really important (for example, where to park for the festival that your supporter has a ticket for), you can feel sure that some people won’t be unsubscribed. Note that we give you the direct ability to resubscribe email contacts.
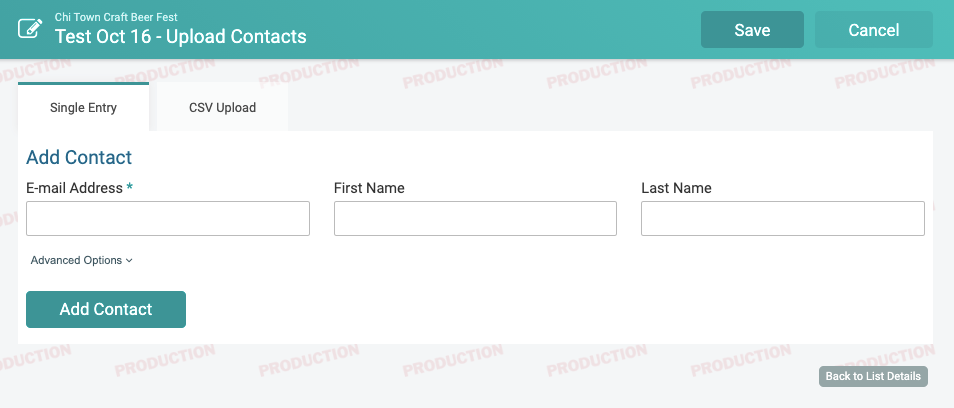
Create, Import, or Choose a Contact List
We give you the ability to upload contacts. You can do this one at a time:
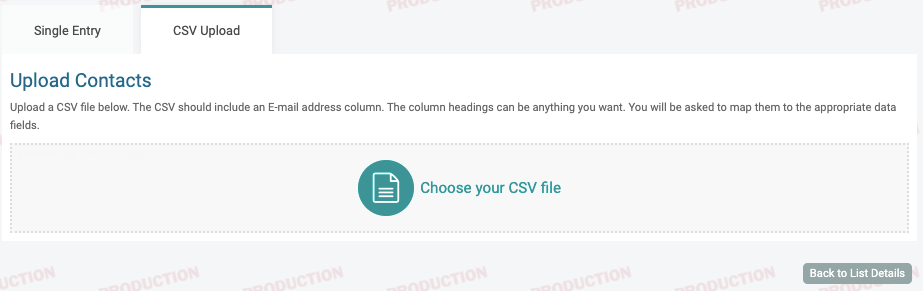
Or upload multiple contacts at one time using a CSV file:
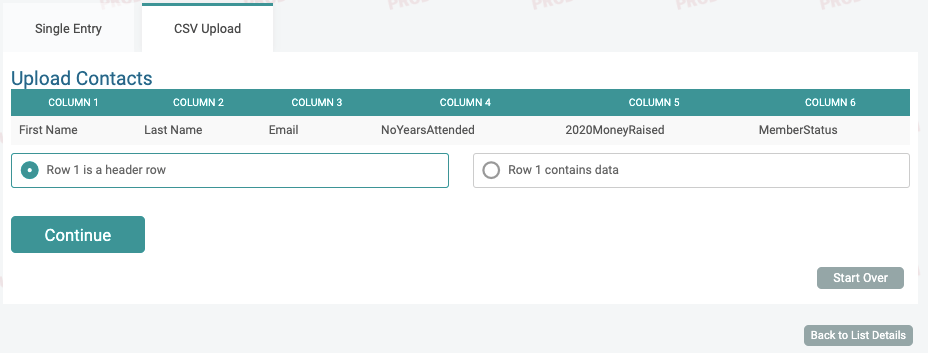
When you upload a CSV, it is easiest to have the first row be headers. This will make it easy to upload custom data with each contact, such as how much they gave in 2020. Here is an example spreadsheet:

Here is a sample file you can download and test with: 2020Attendees,csv
When you upload, the system will ask you if Row 1 is a header row:
Our upload file has several key information pieces about past attendees including the money they raised in 2020, and it is simple to add that data as a dynamic replacement tag with a Custom Placeholder:
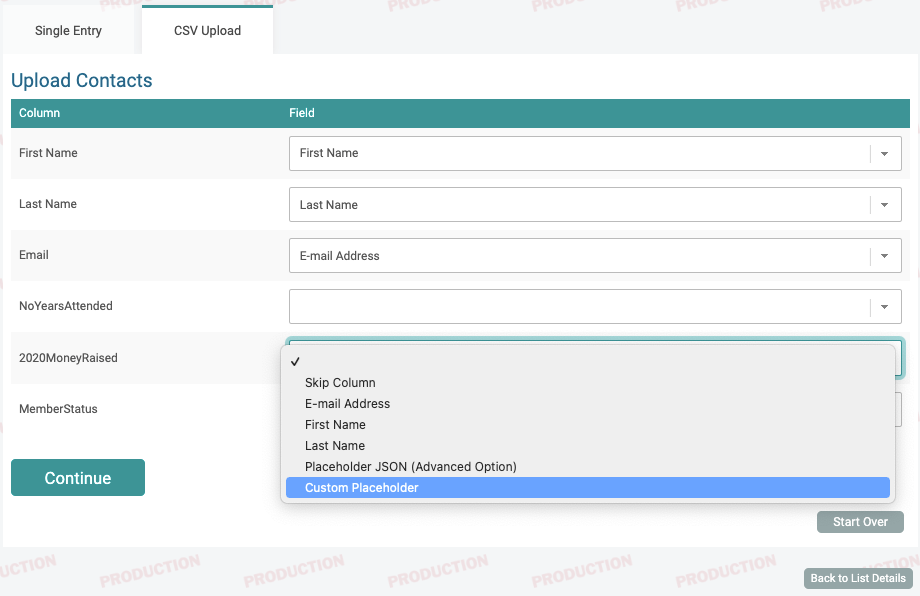
We can even rename the placeholder. For this data, we are naming in 2020MONEY. This is the replacement tag you will use in the content of your email to personalize your messages to past attendees.

How many contacts can you upload? We support up to 100,000 rows of data at a time for each upload. We have a limit of 500,000 contacts per list and per email at this time (we will likely expand that limit in the future). So, if you have more, you will have to break it into multiple lists or multiple emails. Oh, and remember, this is free. You can send unlimited emails to supporters for free as long as you have a payment account with us and are going to use us to raise money via our donation, fundraising, ticket, or registration services.
NEW: Choose a default list from your ticket purchasers or ticket holders by ticket groups:
Design Your Email and Add Content
Sending an email is simple. Select participants, enter a subject line, and the enter the email text you want to send:
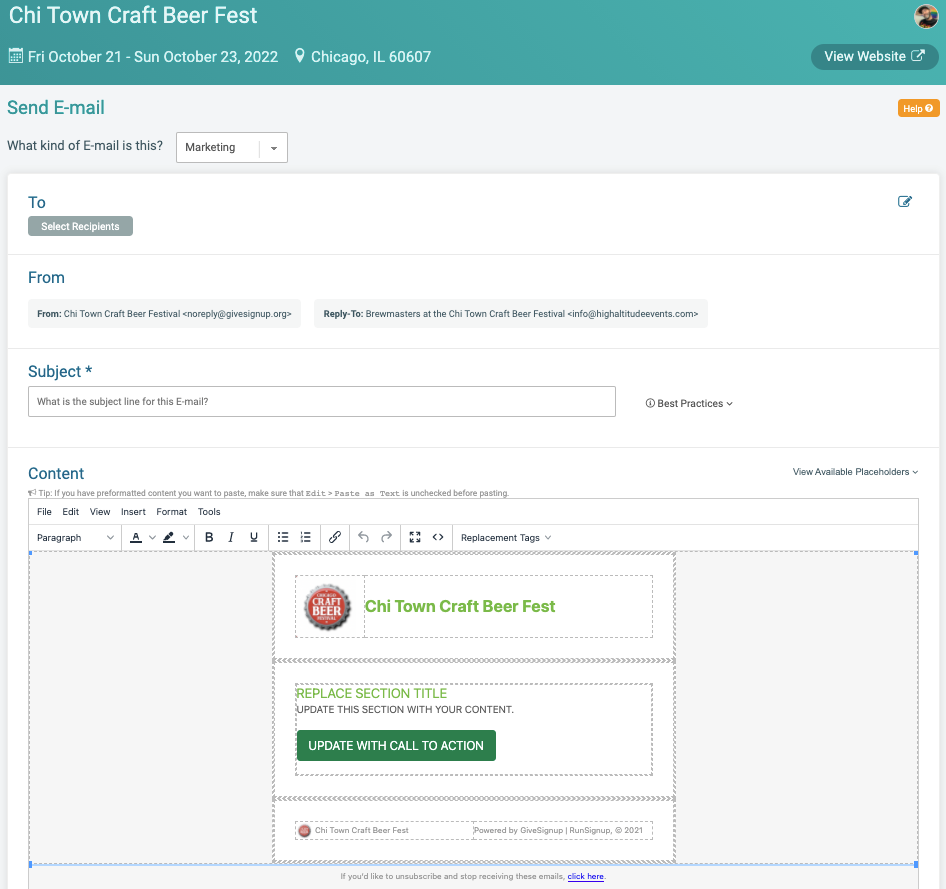
Select Recipients: We give you a simple button for all of ticket purchasers or ticket holders. We also show all custom lists that you have uploaded. Finally, you can add single contacts with the dropdown on the upper right.
Create Content: Today, we offer a simple sample email. You can fill in the content you want and customize the button. It is a fairly powerful editor that allows for full HTML if you are an advanced user. Further below in this blog, we will show you the plans we have for a more robust and easier-to-use Email Builder.
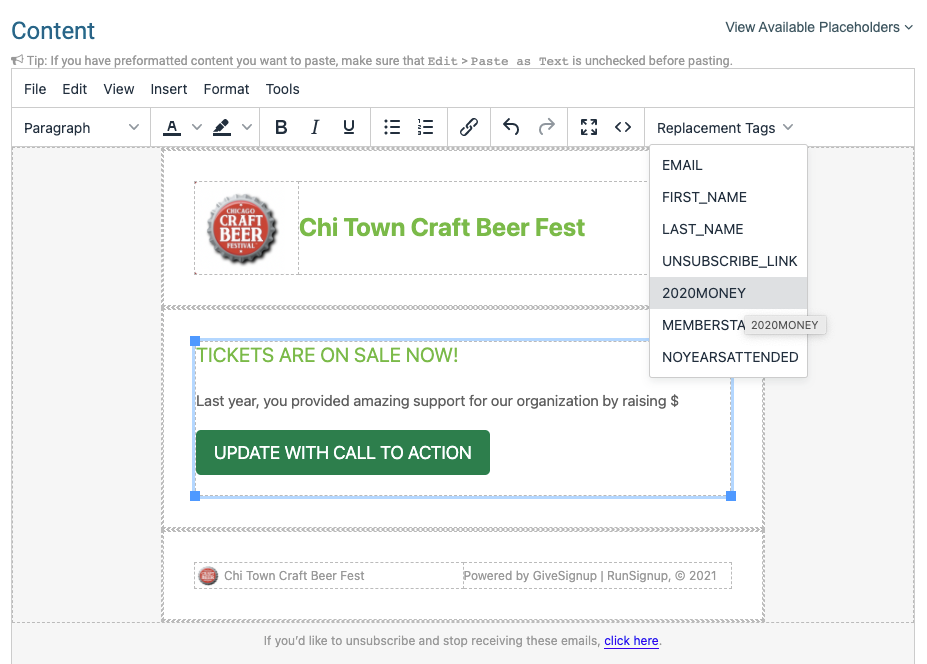
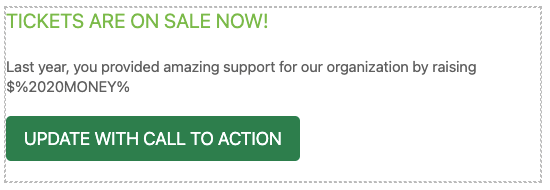
Include Data Replacement Tags: One of the most powerful parts of our email system are the custom tags. Using the dropdown menu at the top of the editor, you can insert those tags easily. In the example below, the %2020MONEY% data replacement tag will render each individual’s amount raised from the custom list we imported above in their email.
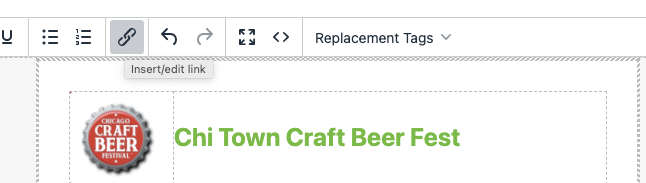
We include a formatted call-to-action button. To edit this, click the little link button at the top of the editor:
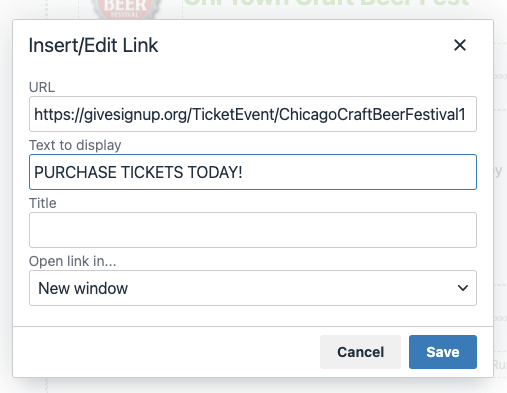
Then, replace the text with the appropriate information:
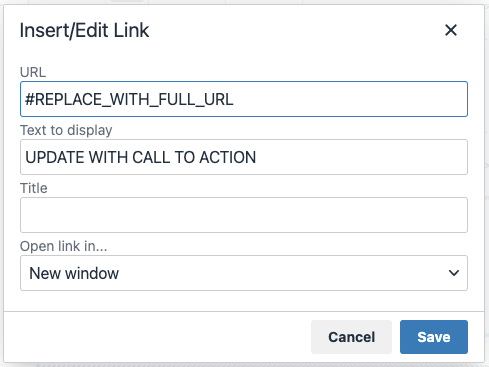
The URL is the URL for your Ticket Event Website, Donation Website, or Donation Form– or any other URL. Add what you want the button to say — like “Donate” or “Buy Tickets.”
Send Your Email
Confirm and Schedule Emails: Click on the button at the bottom, and it will ask you to confirm the email. It will show you the people you are sending it to (click the “Estimated Recipient Count” if you want to confirm how many emails you will be sending). The confirmation page allows you to add default placeholders, like “Dear Friend” if the contact does not have a first name.
We also allow for scheduling of emails. This allows you to schedule several emails over the next two months before a focused date like the opening of ticket sales to get people ready to give right up front, and the system will remember when to send them for you automatically.
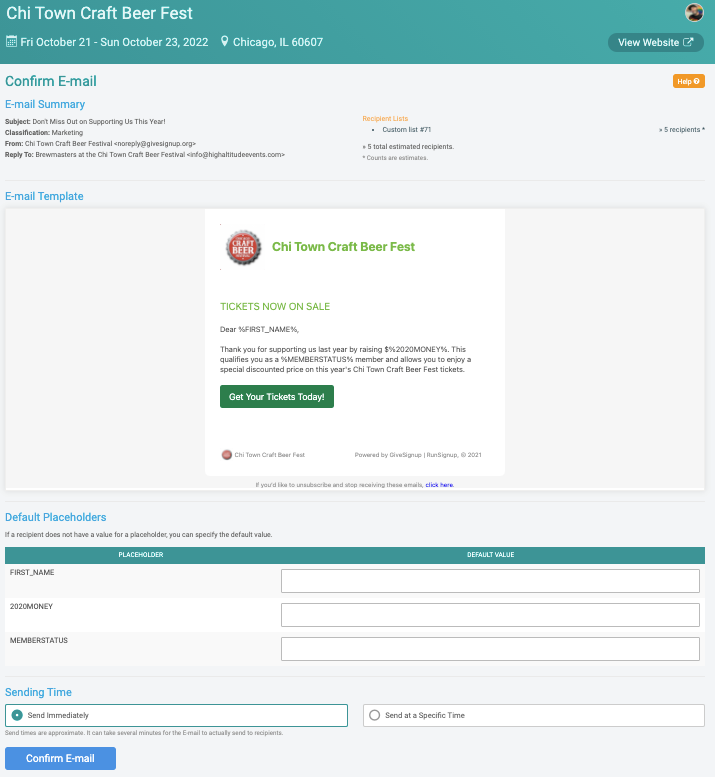
Take Advantage of Email Data Merging: This is what the email looks like to the recipient. Note the first name, member level, and the donation amount have taken the place of those placeholders we put in the email we set up above.
Three Essential Email Communications to Your Ticket Holders
Email #1: Invite your supporters to your event
You’ve developed an incredible experience that will entertain and inspire your guests for your upcoming gala, golf tournament, or festival. But, how will they know about it?
Import your current and past supporters contact information along with historical data to create a list of contacts to send the invitation to. Jump back up to our tutorial, “Create a Contact List” for step-by-step instructions.
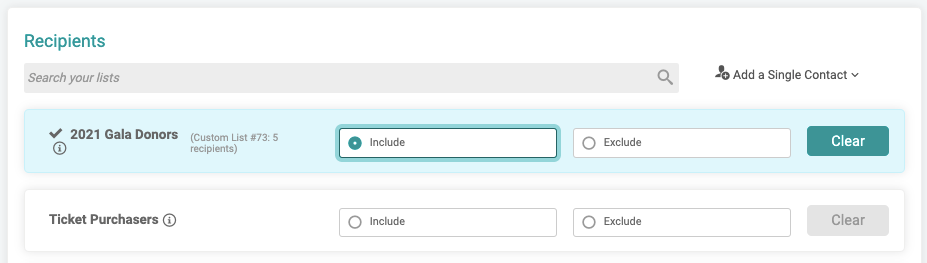
Email #2: Motivate potential attendees with a “Last Chance” marketing push with default and custom lists
Remind your supporters that have yet to buy tickets about your event with a “Last Chance” marketing email to your custom contact list, excluding current ticket holders.
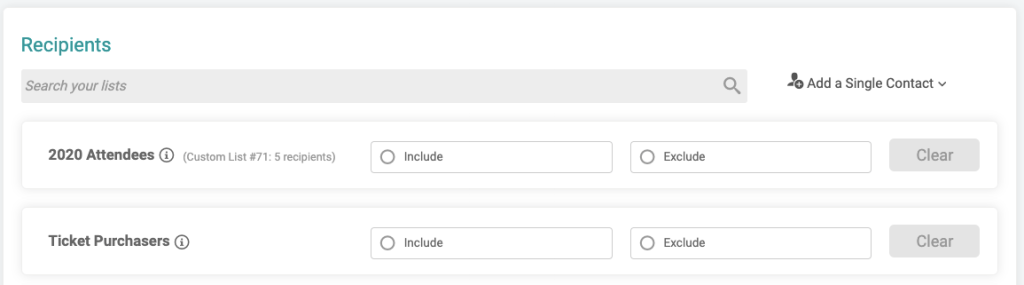
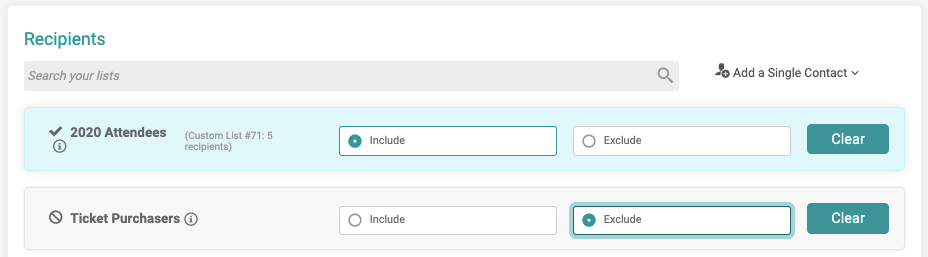
Custom and Default Lists As people from your list of contacts begin purchasing tickets, you’ll want to know who has not committed yet and should continue to receive emails encouraging them to attend. With TicketSignup, you’ll have the option to include all email addresses on your custom list but exclude those that have already purchased tickets from default lists. This feature allows you to streamline your communications, ensuring all receive up-to-date and relevant information and directives to support your organization.
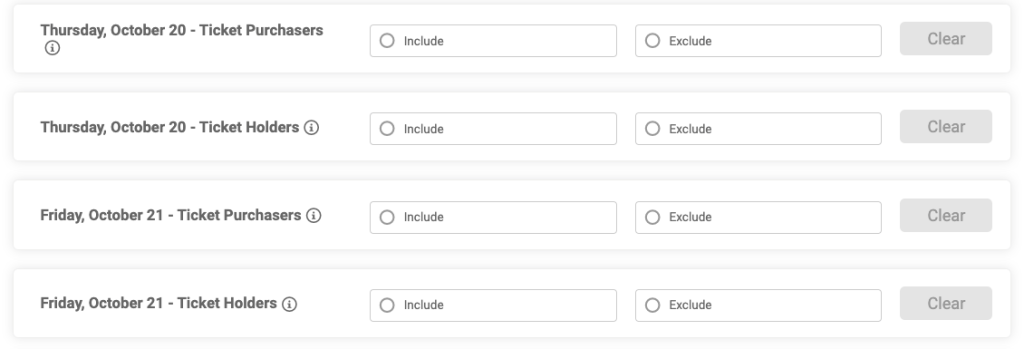
First, select your custom list as your foundation of contacts to send to:
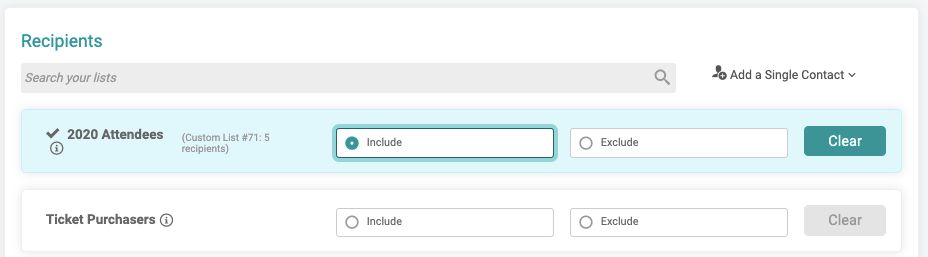
Next, select which default list of ticket holders or ticket purchasers to exclude so they are not asked to buy a ticket when they have already done so!
You can schedule these emails well in advance of special days like a price increase or holiday and know that when it goes out, it will be up-to-date and only reach those that you are still working to convert to buying a ticket.
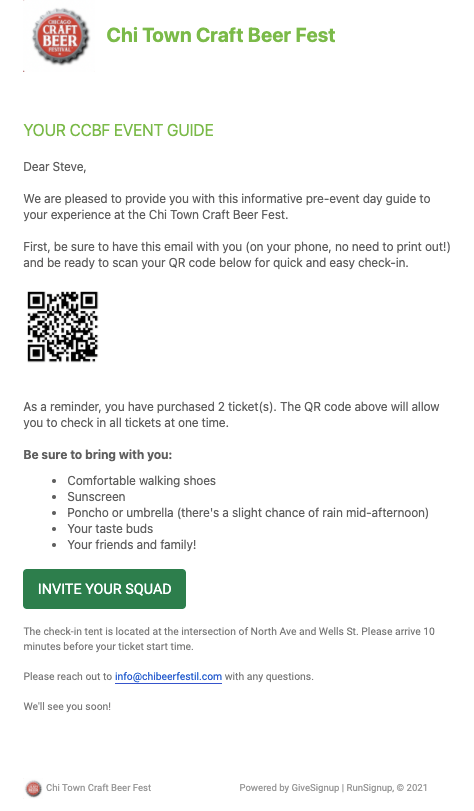
Email #3: Send a pre-event email with an event guide and personalized data replacement tags and QR Code.
As your event date approaches, your ticket holders will be hungry for information about the 4-1-1 on your event. When to arrive, where to park, what to bring, etc. A comprehensive but simple event guide is key to setting up your guests for a fun and worry-free experience.
With TicketSignup’s new email tool, you have the ability to insert custom information about your event and your ticket holders to personalize the email. This increases the likelihood that your supporters will receive and read your email while making them feel special and valued. It’s also an opportunity to give them specific instructions or suggestions on how they show up for your event, potentially easing the logistical lift for your organizing team.
NOW: Insert QR Codes for Ticket Purchases For example, tell everyone to have their digital ticket with their custom QR code out and ready when they approach the check-in station. Fast lines = happy attendees!
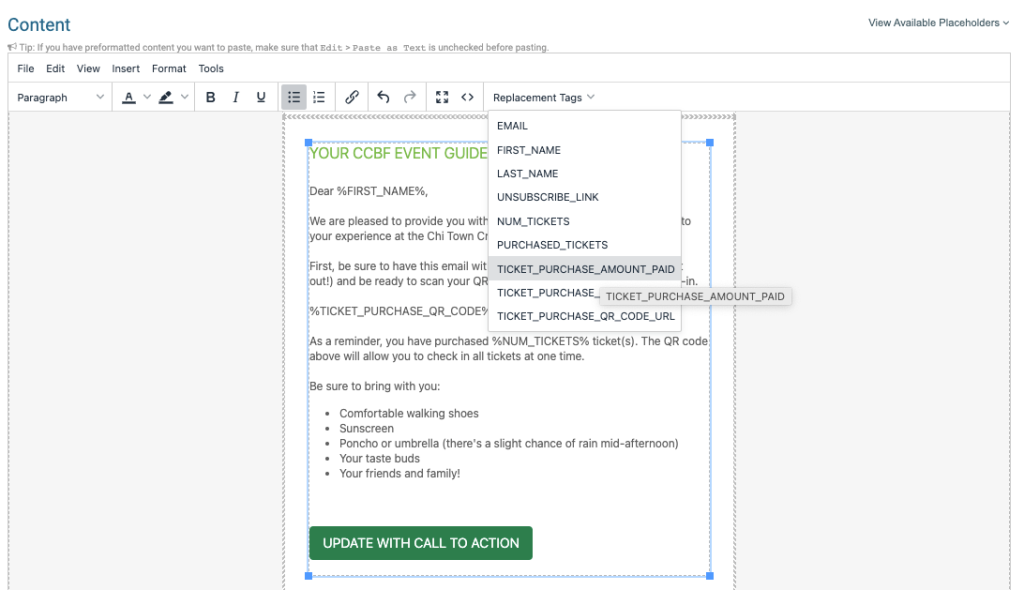
How did we get custom data for each ticket purchaser into the email body?
Insert Personalized Information Within the content section of your email, use the “Replacement Tag” drop-down to choose from a list of available data about your ticket holders and purchasers. Selecting a tag will automatically pull that information for each ticket holder and display in the specific email that is sent to their inbox.
Use Our CheckIn App With your attendees armed with QR codes, be sure to setup your TicketSignup CheckIn App. Check out our TicketSignup Event CheckIn App blog for an easy-to-follow tutorial on how to get set up and start checking in guests in no time!
