Event organizers now have more flexibility in customizing ticket purchase confirmations. Previously, QR codes have been required to show in purchase notifications. Now, the QR code is optional and can be removed to simplify your confirmation messages.
Remove QR Code
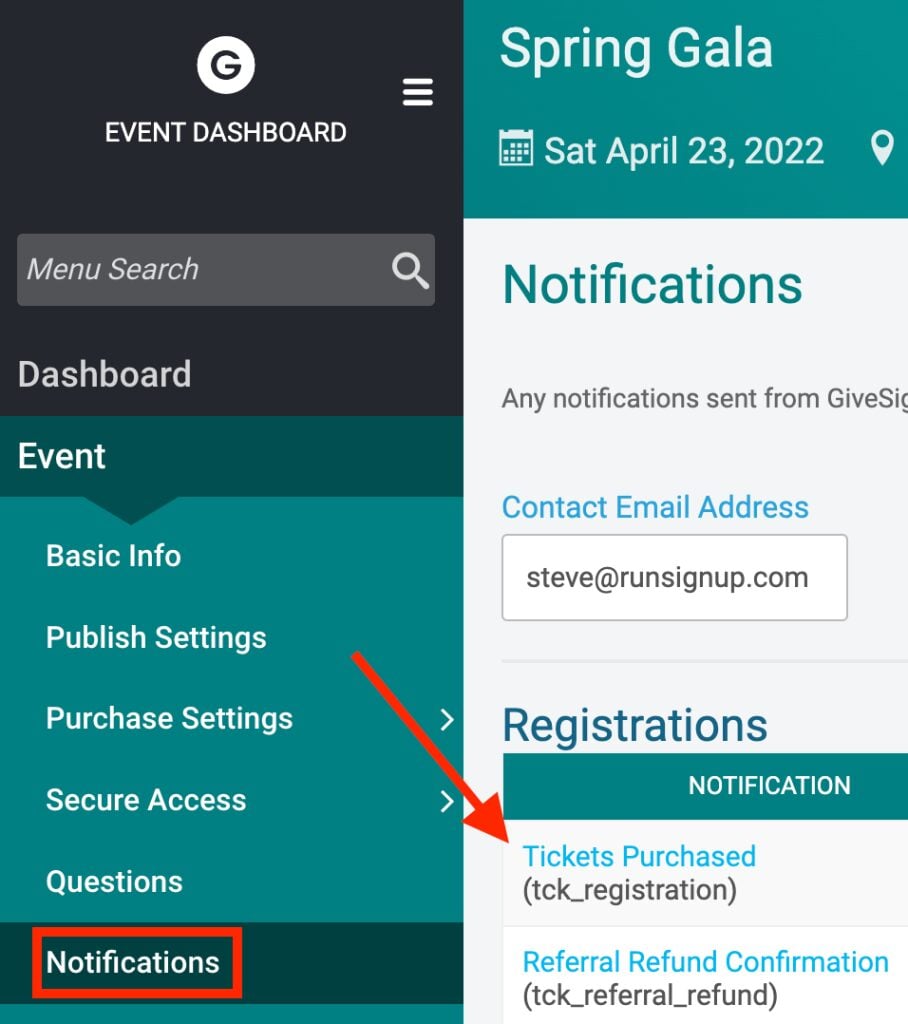
To remove the QR code, navigate to Event >> Notifications and click on Tickets Purchased under the Registrations section.
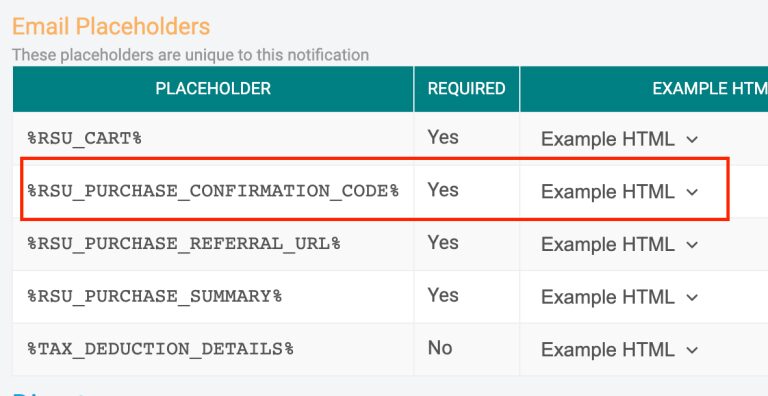
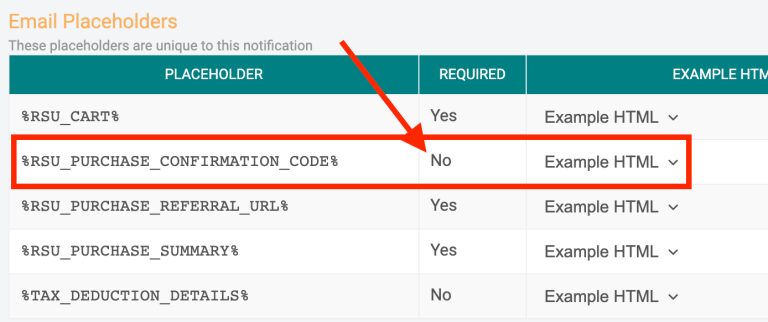
Go to the first text box on the page under the header, User. This is where you can customize the message that is automatically sent to your ticket purchasers. Simple highlight the field, %RSU_PURCHASE_CONFIRMATION_CODE%, and delete the placeholder.
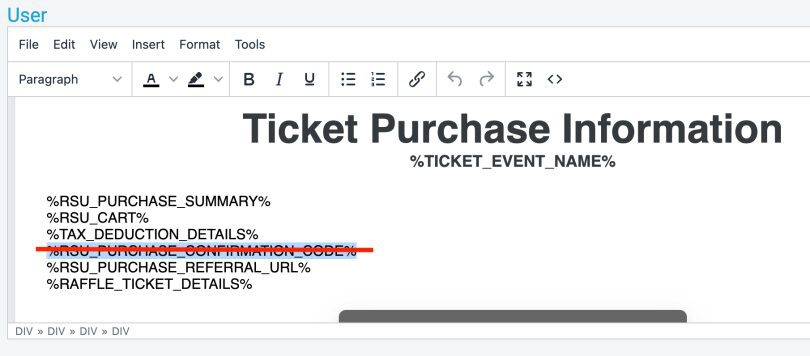
Be sure to save your changes by clicking the blue “Save” button further down the page.

Add QR Code Back In
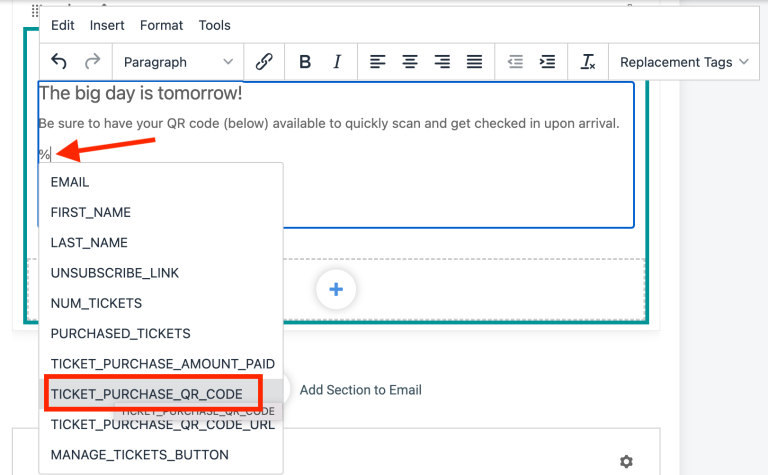
You can always add it back in by scrolling to the Email placeholders section, copying the replacement tag for QR codes, “%RSU_PURCHASE_CONFIRMATION_CODE%,” and pasting it back into the User confirmation message text box.
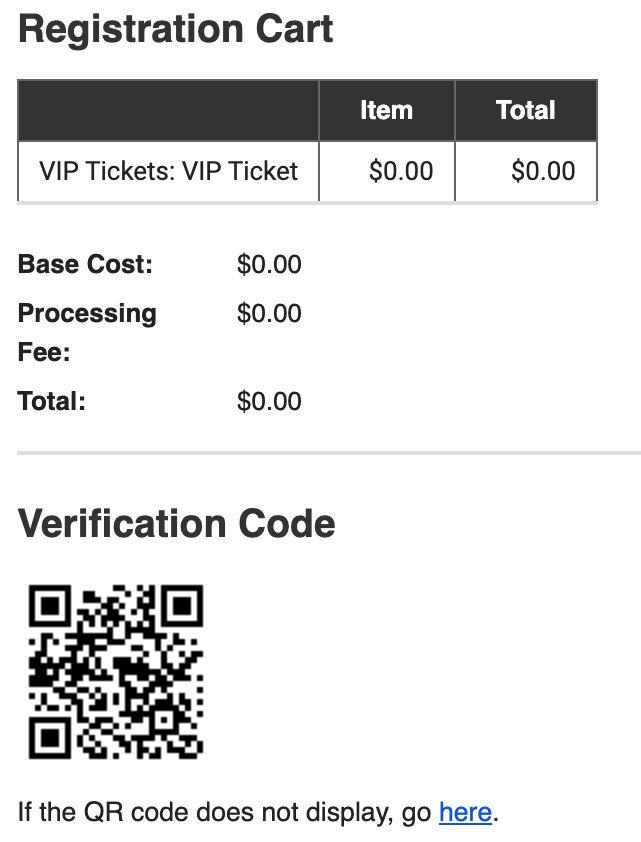
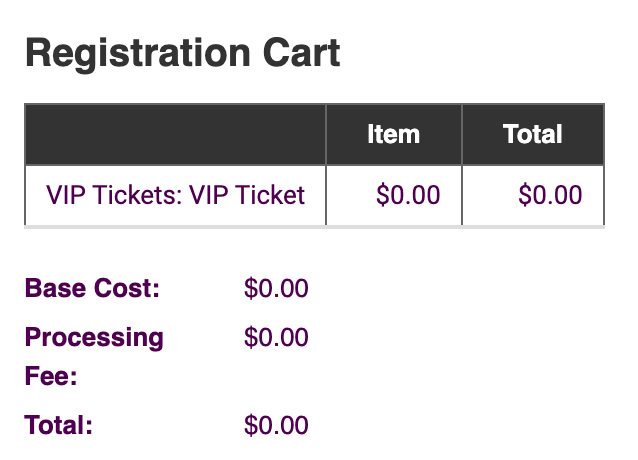
See below for examples of the confirmation email with and without a QR code.
Send QR Codes Later
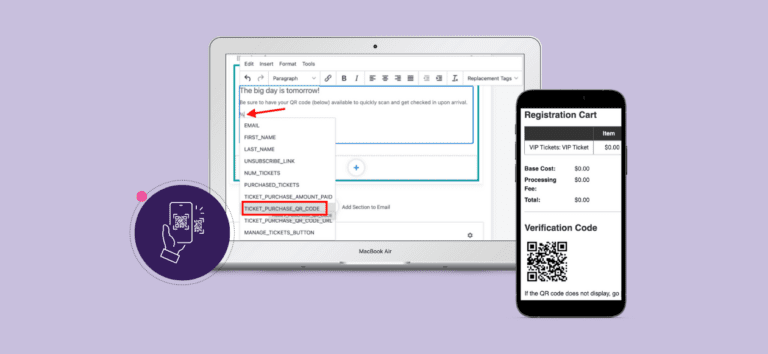
Remember, QR codes can still be sent out at a later date by using our next-gen FREE Email Marketing and Email Builder Tool with data replacement tags. This is achieved by simply inserting the QR code replacement tag in the body of the email you want to send.
Pushing out QR codes the day before your event helps attendees (and the event organizers) enjoy a quick and easy checkin experience.
Customizing notifications allows event organizers to have more control over what information and how much is sent to their attendees. Removing the QR code can shorten message lengths and prioritize the most relevant information (what ticket did they buy, how much did they pay, etc) at the time of purchase. It’s also helpful if you are hosting a virtual ticketing event where checkins are not necessary.