If you’re hosting an outdoor event, a rainstorm, snow storm or heat wave could easily derail your plans. And if you are lucky, you might have more people who want to come to your event than you have capacity for. Hosting events comes with a lot of uncertainty and unknowns outside of inclement weather: staffing changes, illnesses, and vendor issues can all lead to last-minute changes, which is why TicketSignup’s Ticket Cap and Ticket Transfer features are important and useful. This blog will provide a brief but comprehensive overview of how to use these features to make your ticketed event run smoothly, with little effort on your part.
Enabling Ticket Transfers
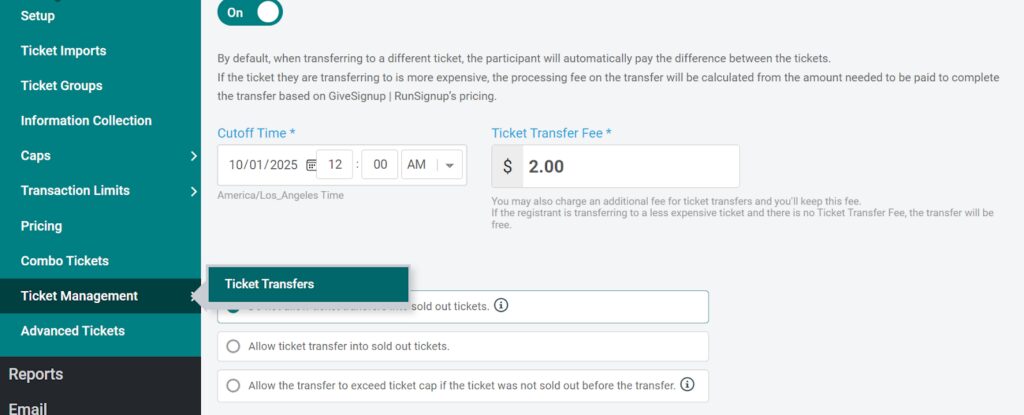
With TicketSignup’s self-serve ticket transfer feature, you can allow guests to transfer their ticket to a different day. Just go to your event dashboard, and under the Ticket tab, scroll down to Ticket Management. There, you can enable Ticket Transfers. You can set a cutoff date and time to allow transfers, as well as enable a ticket transfer fee. In the example below, the fee was set to $2.00, which is a simple way to earn additional revenue.
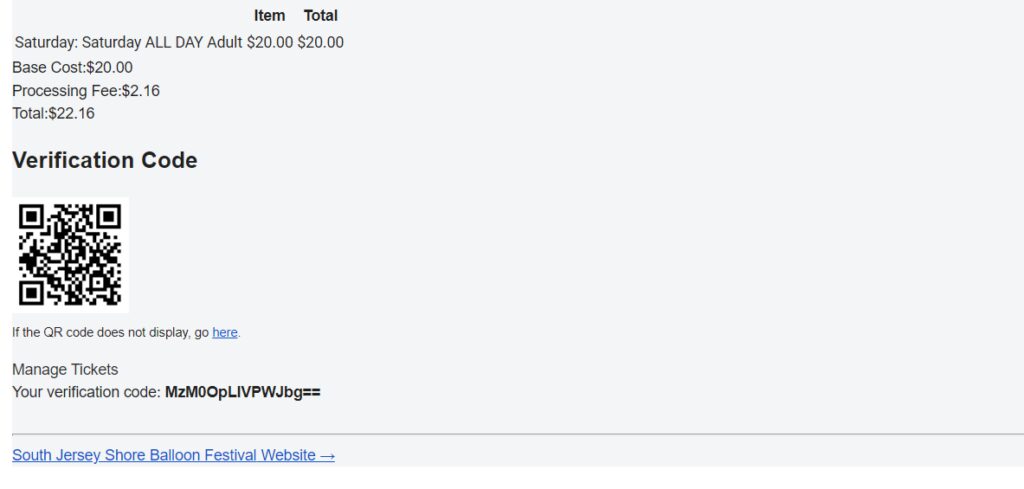
Here’s what it looks like for a ticket purchaser. After purchasing a ticket, a guest will receive an email confirmation that contains a QR code (below). Click on “Manage Tickets”
They may have to enter the verification code, and then they’ll see a screen like this, where they can transfer tickets to another day. Since this event is set up to charge a transfer fee, a customer would then have to pay a few additional dollars. The upside for an event organizer is that you will earn a few extra dollars and your guest will be satisfied with the ease of their transaction.

Ticket Caps & Time Slots
Maybe you host a haunted house and can only allow a certain number of tickets to be sold each night, or even within time slots of a given night. Our ticket cap feature allows you to set an exact number of tickets sold in any given time period. This is an easy way to manage attendance and ensure your event space doesn’t get overcrowded.
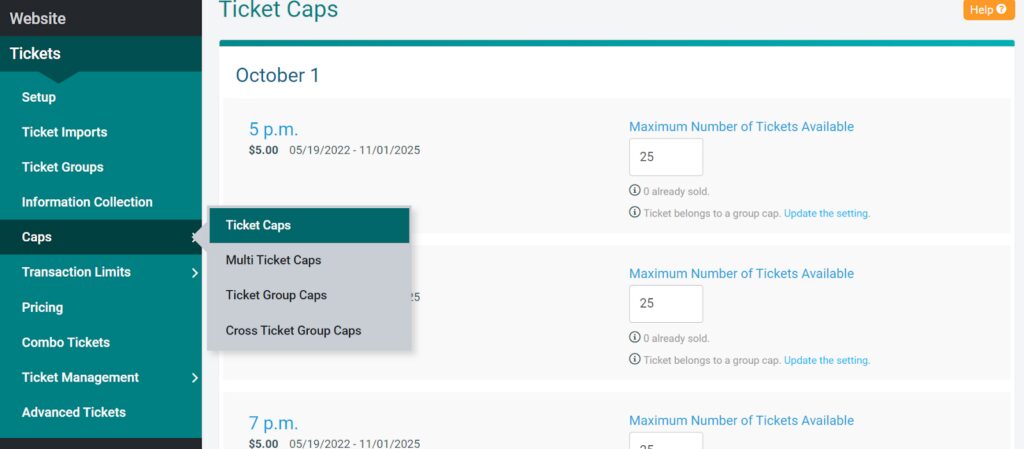
To set ticket caps, go to the ticketing tab in your dashboard and select “Caps.” From there you can add ticket caps on each day and/or time slot. In the example to the right, the ticket cap for each out is set to 25.
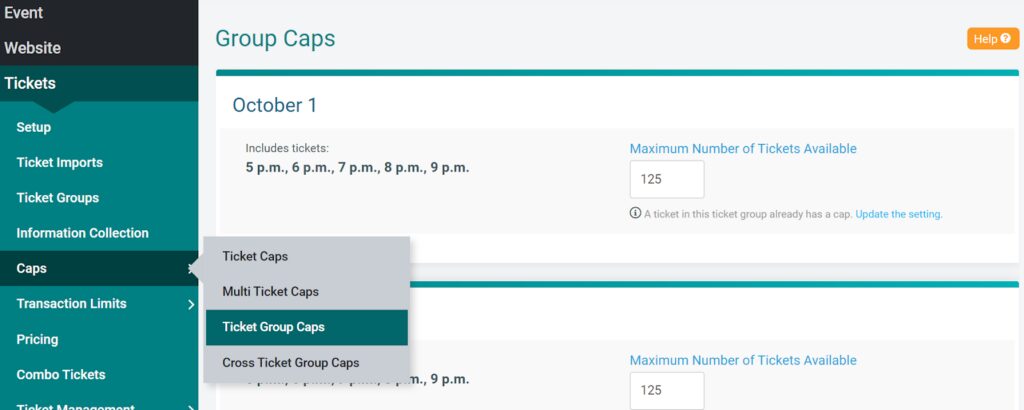
For this particular event, tickets for each day are built into groups, enabling the event host to cap not only each time slot, but each ticket group as well. To set a ticket cap for a ticket group, go to the “Ticket Group Caps” drop down (example to the right).
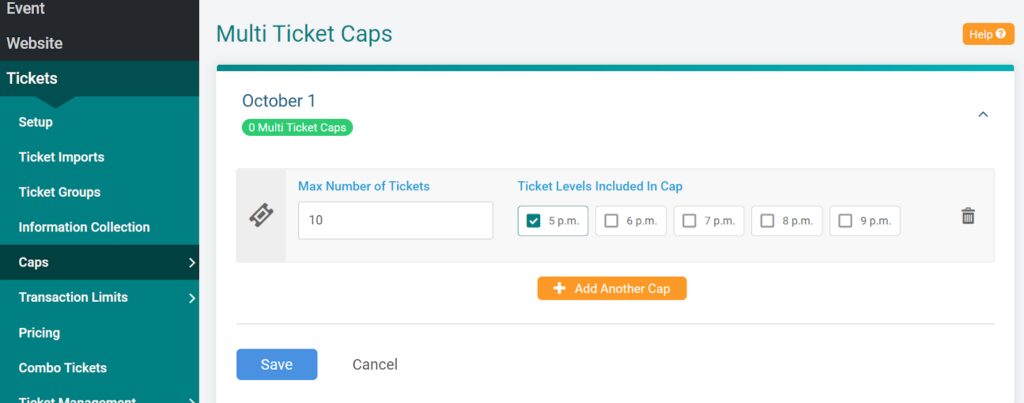
You can also limit the number of tickets purchased at once through the “Multi Ticket Caps” dropdown. In the example to the right, I limited the number of tickets purchased for the 5 p.m. time slot on October 1st to 10. As an event organizer, you may want to limit the number of tickets that can be purchased in any single transaction to avoid potential issues with fraud or scalping.
Each of these features takes only seconds to set up, and can be reversed or updated just as easily. If you find that 25 tickets per time slot is too many or not enough, you can easily go back to your event dashboard and update the ticket caps. Since TicketSignup’s event pages are easy to set up and quick to update, you can also build a notice on your event page letting people know about changes or cancellations. With our free email marketing tool, you can contact ticket holders directly with updated event information and instructions on how to transfer or cancel their ticket purchases.
Utilizing Ticket Caps, Ticket Transfers, and communicating clearly with your attendees will help you host a seamless and enjoyable event.
Questions?
If you’d like more information on how you can take advantage of the various tools available at TicketSignup, please contact your TicketSignup Account Manager or email info@ticketsignup.org