Need to sell tickets for your dinner event, banquet, luncheon, or gala? Like every event on TicketSignup, dinner events automatically include free websites, free email, an event day app, and more. You can learn more about all the TicketSignup features for dinner events and galas here, but in this blog, we’re focusing on two key challenges we see with a lot of dinner events:
- How to manage table assignments ahead of time or on-site
- How to increase your per-ticket revenue through donations and store items.
Managing Table Assignments for Dinner Events and Galas
There are a few ways to assign tables for your dinner event, depending on your needs. Some events only dinner tickets by the seat, while others allow purchasers to buy out an entire table. Regardless, TicketSignup enables you to let your guests select their own table assignment. Additionally, your staff can assign tables on-site, as needed.
Allowing Ticket Purchasers to Select Table During Registration
For maximum flexibility, use custom questions to share all the table options and let purchasers select their own table. A few pro tips if you go this route:
- Within the custom question, set a limit for the number of chairs. This will make the table unavailable once full.
- Make sure you upload a mockup of the table layout so purchasers know which table they are selecting.
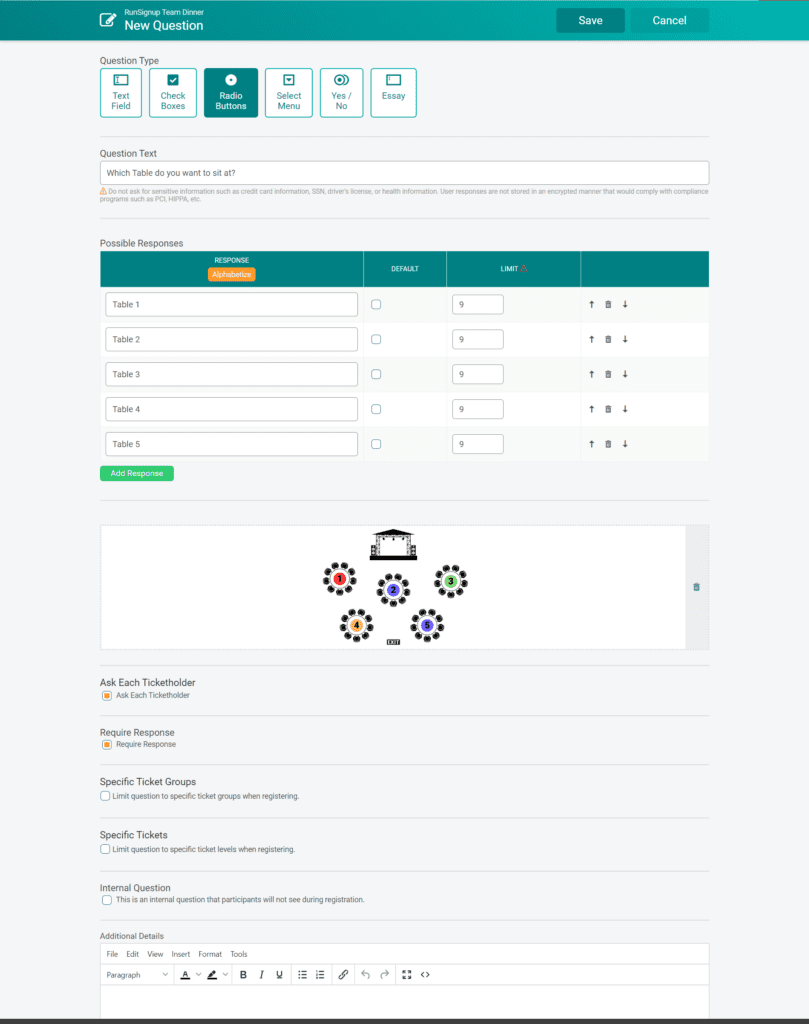
Setting Up Your Custom Question:
On the backend, you’ll set this up by going to Event -> Questions. Opt for Radio Buttons, upload a diagram of your tables, and add a limit to each table option. Typically you will want to ask this question of each ticketholder (so all tickets are assigned a table, not just the ticket purchaser). Many events will also choose to require a response to this question, but you can also leave it not required and assign tables on-site for anyone who did not select their own table in advance. You can also enable this question only for specific groups; I.E., if your VIP ticket allows for seat selection, but your General Admission ticket does not.
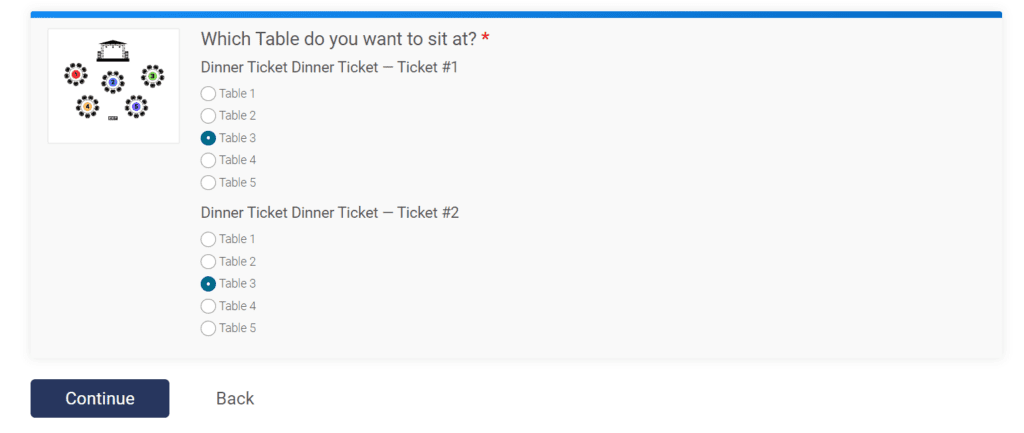
What Your Ticket Purchasers See:
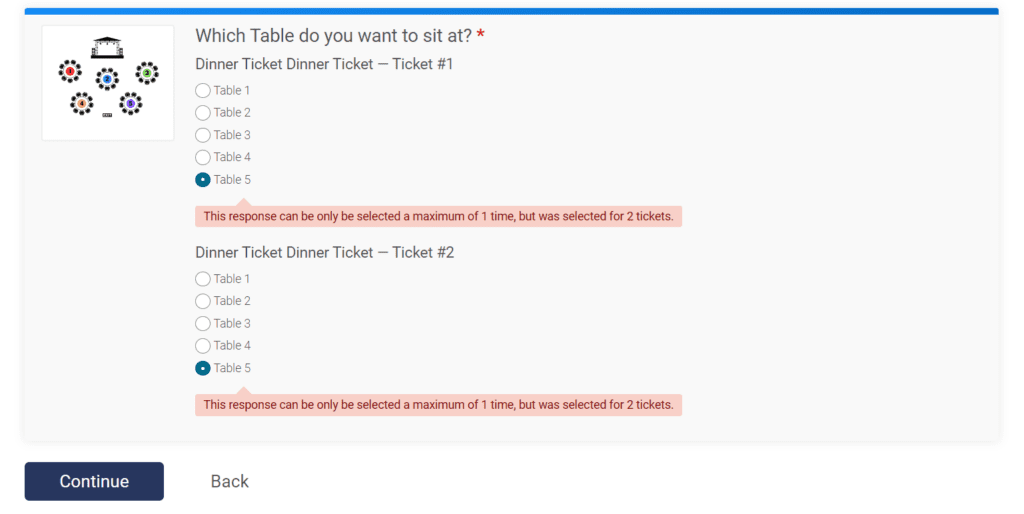
When purchasers are buying tickets, they are asked which table they want to select. They can click on the ticket diagram to see that in full size. If a table is full when the ticket purchase begins, it will not show as an option. However, if the table has some room but not have enough open seats for the number of selections, the purchaser will get an error letting them know how many seats are left at that table.
Assigning Tables On-Site
Whether you want to do all your table assignments on-site or just need to assign tables for people who declined to choose one during ticket purchase, the process is similar. The setup differences are:
- If you are allowing (but not requiring) ticket purchasers to pick their own table in registration, simply follow the setup above but uncheck “Require Response”.
- If you are doing all table assignments on-site, you still want to setup the custom question. However, uncheck and instead check “Internal Question”. This means the question will not appear during purchase, but the event organizer can see and update it. Important: you still need to have “Ask Each Ticket Holder” checked for the question to show in the App for assignment on-site.
To assign tables on-site, you’ll want to download the TicketSignup Tickets App for IOS or Android. There are three settings you want to check to ensure easy access to assigning tables:
- Event Settings -> Select Your Preset -> Ticket Change Settings: Click to Allow Ticket Info Edit
- Event Settings -> Select Your Preset -> Ticket View Settings: Click to Show the Table Assignment Question
- Event Settings -> Select Your Configuration -> Check In Steps: Click Update Ticket Info
Once your app is setup for on-site table assignment, you’ll have the option to select a table during check-in. If you allowed some purchasers to choose their table in advance, their selection will show in this step.
Note: this feature requires an internet connection for the devices used for check-in. The internet connection is required to ensure your table caps aren’t exceeded.
Setting Up On-Site Table Assignment in the Tickets App
Assigning a Table During Check-In
Increasing Per-Ticket Revenue for Your Dinner Event
Most dinner events and galas are fundraising focused, and increasing the amount of revenue from each ticket can make a big difference to your organization. There are two main ways to increase your per-ticket revenue: through donations (for nonprofit events), and through a store.
Using Donations to Increase Per-Ticket Revenue at Your Dinner Event
If your dinner event is a nonprofit fundraiser, you can add a donation ask directly into your purchase path. To enable donations, go to Donations -> Donations Setup.
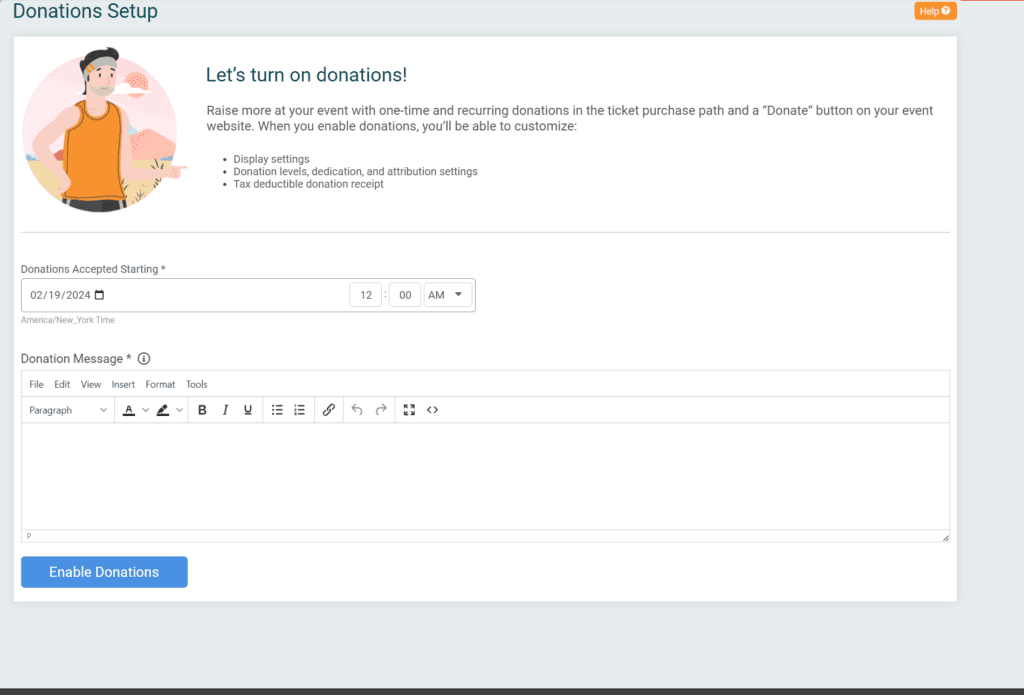
While that’s all that’s needed to enable donations, if you want to maximize your donation collection, we recommend customizing a few options. Four things you can do to increase donations to your dinner event include:
- Under Donations -> Donations Setup -> General Settings, customize your donation message with details about the impact donations will have on your organization, and add your nonprofit logo.
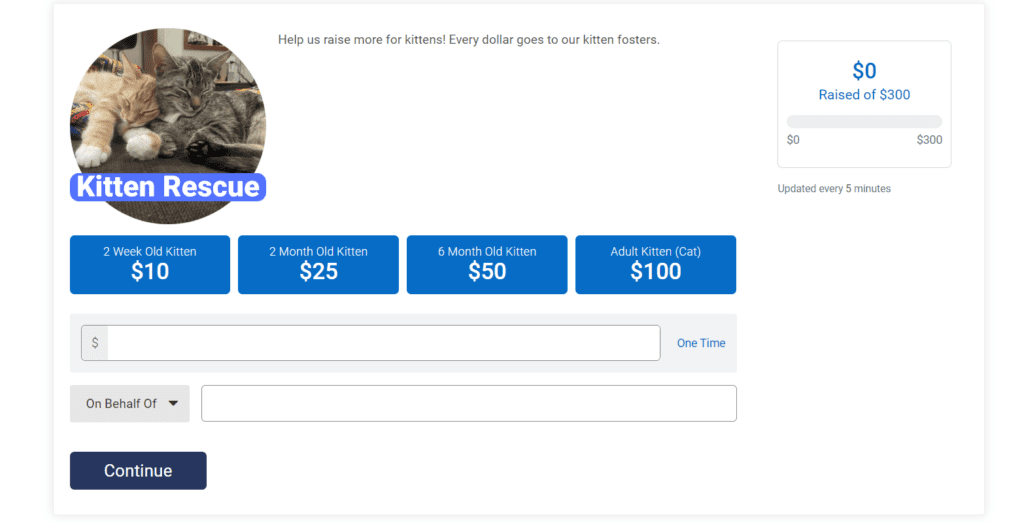
- Under Donations -> Donations Setup -> General Settings, setup Donation Levels to pre-populate dollar amounts for your donors. While they can still donate any dollar amount, having donation levels set up makes it easier for them to make a donation quickly. To make donation levels even more impactful, use levels that associate directly to your organization’s mission or to ways the funds will be used.
- Under Donations -> Donations Setup -> Donation Display Settings add a donation goal to your event and click “Show goal progress” under the goal amount. This will add a goal thermometer to the donate page on your event, providing a real-time look at your donation collection.
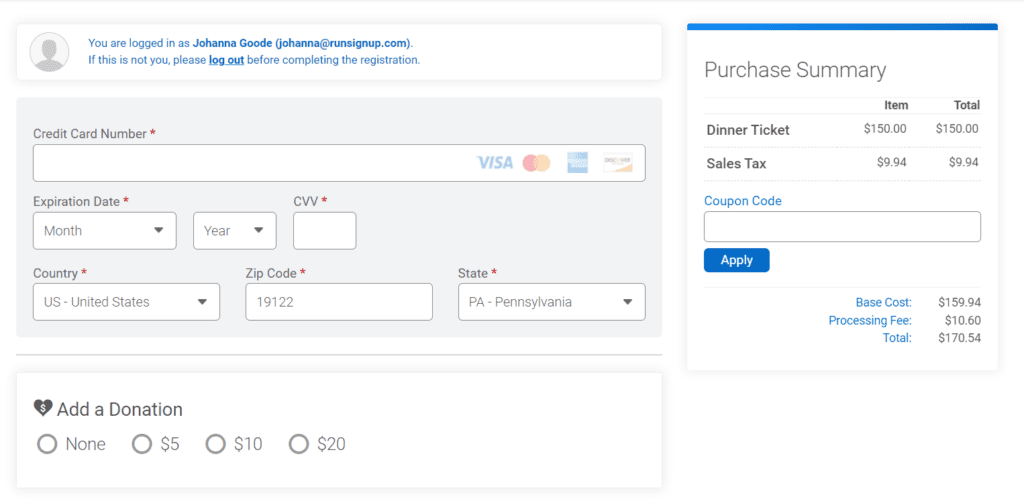
- Under Donations -> Donations Setup -> Checkout Add-On, add a checkbox donation option (or up to 3 options) to your event. If this is enabled, ticket purchasers who do not initially make a donation are provided another option at checkout, with a quick checkbox option to add a donation. This option can significantly increase donation dollars by capturing speedy purchasers who may support your mission – but flipped through your donation page too quickly to make a donation.
Donation Step Within Ticket Purchase
Checkout Add-On Donation Option at Checkout
Using Store to Increase Per-Ticket Revenue for Your Dinner Event
In addition to donations, you can increase your per-ticket revenue by offering add-on items through the Store on TicketSignup. Add-on items can be physical merch (like a t-shirt or bumper sticker), add-ons to the dinner (like Champagne for the toast or a beverage pairing), or experiential upgrades (like VIP parking or a pre-vent cocktail hour).
Setting Up a Store For Your Dinner Event
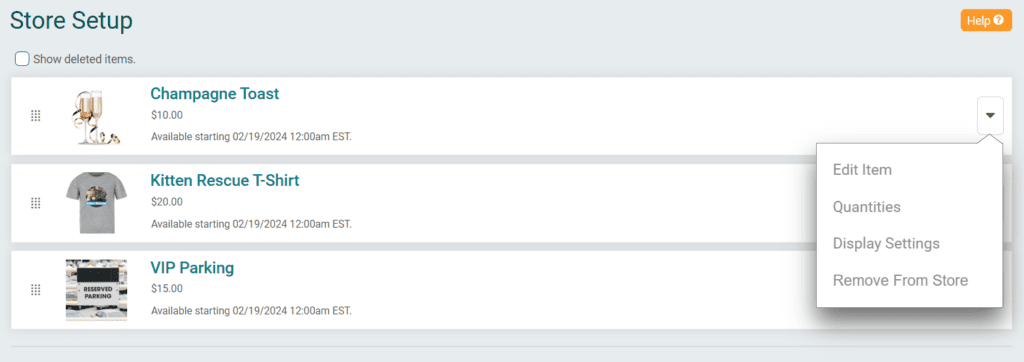
You can add as many items to your store as you want. Once you’ve added your store items (Store -> Store Setup -> Add Store Items), you can customize them in several ways by clicking on the menu options for each store item.
- Edit Item lets you update the basic information about the store item, including the name, dates of availability, when it’s available for purchase (during ticket purchase, in a standalone store outside of ticket purchase, or anytime), and any variants (I.E. size and/or color). Tip: for extra impact, use the “Strikethrough Price” to show one or more of your items at a “discount” rate. Everyone loves a bargain!
- Quantities lets you set any inventory for the item (for example, if you only have 20 parking spots).
- Display Settings lets you add an image and a description to make your store item more enticing.
Once your store is setup, ticket purchasers can be asked if they want to add-on any options during purchase. You may be surprised how many people are happy to spend a little more for some merch or VIP treatment – increasing the per-ticket revenue for your event.
If you want more information on how to use TicketSignup for your dinner or gala event, check out the dinner event page here. If you’re ready to start setting up, you can also create your event or schedule a call with a TicketSignup team member.